Wednesday, July 31, 2013
the class quilt: first cut
this has only taken all summer, but there were things like cousins having babies and quilts that family members had asked for to be done... I did say that I wouldn't post the final picture of this until the students and Miss Honey had gotten a chance to see it in person, but here's a production teaser, which doesn't give away anything of my master plan. It's almost August people. School starts in like, 17 days [when you say it like that, it's almost frightening]

Friday, July 26, 2013
two for one special, or beware of friends bearing macy's bags
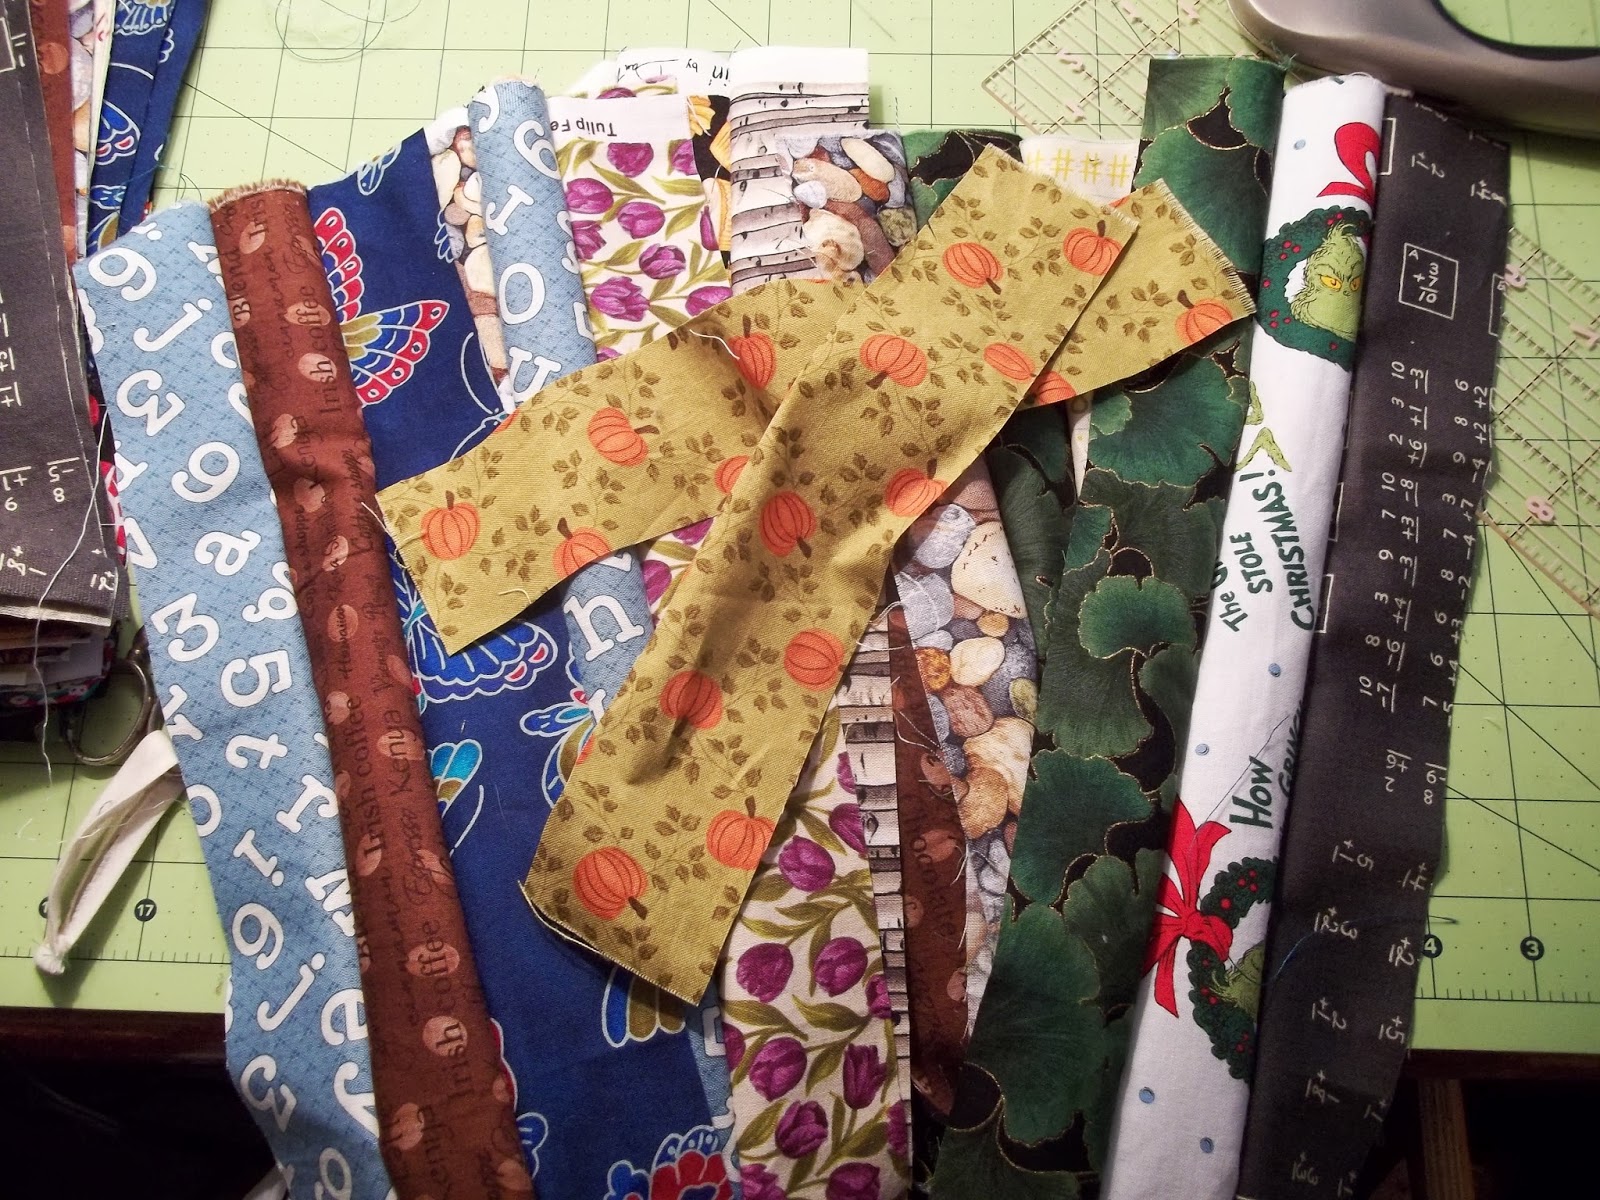
I have quilt tops languishing in limbo, waiting to be finished, and while they are waiting to be finished, I'm working on other projects that need to be finished.
Like a green nine patch. Which doesn't need to be finished but does. If that makes sense. I'm basing it loosely off of Moda's Sweet Menagerie. Loosely for several reasons. First, I had a bunch of green stashed away and wanted to do something with it, and I'm not using the two jelly rolls called for [some jelly rolls have 40 strips and some have 42... seriously people? SERIOUSLY?! are there no industry standards anywhere?!] I'm making it up as I go along, figuring that with something in the neighborhood of 20 fat quarters and an odd assortment of random bits of yardage beyond that, I'm probably good to go. Also, jelly roll strips are cut at 2 1/2 inches wide, and I started cutting 3"... so my quilt is already going to end up bigger. Don't ask me how much. I don't do percentages and I can't even tell you what kind of math I'd need to figure out how much bigger my quilt will end up being from theirs if each of my squares is going to be 1/2" bigger. It's why I love 1st grade math. The green nine patch will have it's own posting at some point, and likely instructions... if that's not copyright infringement?
 Second, Moda's is a twin quilt. I want a double, so I need at least one, if not two more rows of squares. Imagine this picture with not 4 x 6 squares but 6 x 6 and that will be my quilt. Ish.
Third, mine will be all green and a little less organized, if you can't tell from the picture of my squares. My nine patches will be sashed with a solid green instead of a print. Instead of white, I'll use a cream print [the Moda site said one jelly roll of white. I have two yards of a cream. That should do it, right?] I'll keep the solid border, but it'll be green [surprise] Instead of a checkerboard, it will be whatever is left over of the sewn together green blocks and the assorted leftover green yardage [that didn't make it into the nine patches], of which there is a lot. Allofthemtogether. I have a Peter Rabbit square that I'm going to throw in there as my humility square. Because it has green. He looks so chill, chillin' on his cabbage. I don't do kitch, but I've got my reasons for Peter Rabbit.

 that there is my pile of nine patches, pinned up and ready to be stitched together.
 I was gifted with a Macy's bag full of fabrics, and part of that was a partly finished quilt. I. Hate. Sewing. Stars. I hate sewing triangles and I hate putting together triangles. I would not have picked this. I would have seen the picture and said "oh, that's nice" and kept right on moving. But I've got this, and I'm going to finish this. And all the little stars, too. In all it's patriotic glory. There's more to it than this, a stripe and checkerboard motif that looks a little like a flag bunting going all the way around the outside. I'm not sure if this is something I'll keep or if it's destined to become a Quilt of Valor. This is just one of those finish it and see what happens. A whole bunch of patriotic fabric came with it, and whether I keep any of that remains to be seen as well. The local branch of Project Linus was flooded in the recent summer storms, and they are in the process of cleaning out; it's possible I may donate some fabric to them.
Like a green nine patch. Which doesn't need to be finished but does. If that makes sense. I'm basing it loosely off of Moda's Sweet Menagerie. Loosely for several reasons. First, I had a bunch of green stashed away and wanted to do something with it, and I'm not using the two jelly rolls called for [some jelly rolls have 40 strips and some have 42... seriously people? SERIOUSLY?! are there no industry standards anywhere?!] I'm making it up as I go along, figuring that with something in the neighborhood of 20 fat quarters and an odd assortment of random bits of yardage beyond that, I'm probably good to go. Also, jelly roll strips are cut at 2 1/2 inches wide, and I started cutting 3"... so my quilt is already going to end up bigger. Don't ask me how much. I don't do percentages and I can't even tell you what kind of math I'd need to figure out how much bigger my quilt will end up being from theirs if each of my squares is going to be 1/2" bigger. It's why I love 1st grade math. The green nine patch will have it's own posting at some point, and likely instructions... if that's not copyright infringement?
 Second, Moda's is a twin quilt. I want a double, so I need at least one, if not two more rows of squares. Imagine this picture with not 4 x 6 squares but 6 x 6 and that will be my quilt. Ish.
Third, mine will be all green and a little less organized, if you can't tell from the picture of my squares. My nine patches will be sashed with a solid green instead of a print. Instead of white, I'll use a cream print [the Moda site said one jelly roll of white. I have two yards of a cream. That should do it, right?] I'll keep the solid border, but it'll be green [surprise] Instead of a checkerboard, it will be whatever is left over of the sewn together green blocks and the assorted leftover green yardage [that didn't make it into the nine patches], of which there is a lot. Allofthemtogether. I have a Peter Rabbit square that I'm going to throw in there as my humility square. Because it has green. He looks so chill, chillin' on his cabbage. I don't do kitch, but I've got my reasons for Peter Rabbit.


Friday, July 19, 2013
hanging shelves. or a shelf, really.
 It has been so hot the last couple of days that there is no motivation on my end to do anything. At all. We did not have a happy day at preschool/camp this week because of the heat, no matter what we did to stay cool. And Miss Zara's class is truly a bunch of cool cats. Miss Zara ended Wednesday with a ripping migraine. She is now armed with a new ice bag [yeah, the retro kind with the twist on cap you fill with ice] to bring with her next week, and if you can't tell, it has owls on it. I wish I had the funds to buy another one. There were two parliamentary mini ice bags at the store, but I couldn't bring them both home. This one, in addition to the owls, has hearts. There were also zebra and leopard print, and duckies, and I think one had peacock feathers. If I wasn't already giving away jam, I'd have bought up a bunch of these and given them as gifts for birthdays and Holidays, because this is seriously awesome. I never remember to put the icepack in the freezer. But someone in this house usually has ice.
A long while back, I was at IKEA [surprise ... I should just live there. They have beds], and I bought a pair of their brackets with the intention of using them to create a mantle over my fireplace. Except that when I got home I found out that there weren't holes drilled in the brick on the other side of the fireplace. I may have the world's most gracious landlords, but drilling into the brick wasn't on the list of alterations to the apartment, no matter how many holes in the walls I'm allowed to make. And I just don't have the kind of drill that will bore through brick. I've had the brackets for close to two years now, and I'm finally going to do the obvious thing and make a book shelf. Because the actual bookshelf is loaded down with crafting, art, quilt... you get the idea. No books actually occupy the shelves, they sort of sit on top of the shelf, and the children's books live in a bin. To say nothing of the DVD's. Which don't even live here right now.
The brackets have an arm depth of 10 inches, so they will hold a shelf that is at least 12 inches deep. Rather than cart around a 12 inch wide board, which would be heavy, I decided to work smart and got for two pieces of board that could be taken apart in the inevitable event that I move out. My very awesome friend Bill has offered to cut biscuit holes in the sides so they can be fitted together, which will lend some stability. [Bill, incidentally, has the sort of drill and bits that will bore through brick; THOR is molded into the metal casing - I can't make this up] Picking out lumber at a big box store can be risky business. Not that this is a particularly high quality project or anything, but still. Maybe I was spoiled by wood furniture 1 and 2, getting to hand select rough cut lumber from independent mills and then hand milling my own wood. I was crazy excited when I found a piece of poplar with bird's eye stippling, and another with tiger stripes and spalting, which is when a type of fungi grows in the tree and creates any kind of coloration in the wood. I did manage to contain myself. [Girly squealing in the middle of Big-Box lumber store? Yeah right.] My boards did start to warp the minute I brought them out of the store, but then there was a temperature difference of about 20 degrees from inside to out. It was maybe 95 F outside that day. I'm not even going to guess what the humidity difference was. Thankfully, I know people with the sorts of tools to help me deal with that kind of problem.
Hanging shelves is also risky business because you really should hang them from the studs and not just install butterfly wall anchors, especially if the shelves are going to hold anything heavier than a handful of pocket change. Since the whole purpose of my shelf is to be a bookshelf, they're going to need to hold some serious weight, so I'm going to need to find the wall studs and anchor the brackets to those with some very long screws/nails. Which involved a fair amount of banging on the walls, since I'm not going to buy one of those "find the wall stud" gadgets. I started measuring in the corner of the room with a yardstick and banged on the wall until I didn't hear a hollow sort of noise - my yardstick told me the room was framed with 16" on center studs. The bracket on the right side of the picture was super easy to find. The one on the left? Not so much.

I have a shelf for my books now. This is important because I read in bed and my actual bookshelf is occupied by crafting and sewing supplies. So it isn't really a book shelf.... it's a sewing and craft shelf. First world problems, books and craft supplies and blogs.
Friday, July 12, 2013
we be jammin' - a canning story

But seriously, if you've never canned, read this and learn from my mistakes if you're serious about doing this. Or read it and laugh at me, schadenfreuda being what it is. ; )
And, in case you were wondering, we put up strawberry, black raspberry, blueberry lime, mango raspberry and peach jams, peach-apricot and mango-peach-apricot butter and grape jelly.
Canning is a bit like riding a bicycle - you do remember what you're doing once you get on, if you haven't done it in a while - the last time I canned was over holiday break the first semester of graduate school. I actually had an abundance of time, I didn't have crippling migraines and I wasn't in a mad panic about starting student teaching. It was also the dead of winter, and I was at my parent's house, and we were very interested in keeping the kitchen toasty. My mother smiled that knowing sort of mother smile that says I'm going put the training wheels on, step back and watch you do this by yourself. You'd think I'd recognise that smile by now.
The Ball canning website describes canning with something of an idealistic air with that perfect model kitchen modeling their canning products- which, if you're doing it in the heat of the summer in an air conditioned house, and you don't have small children around hanging on you, yes, is pretty fabulous. I did it in my friend's galley kitchen with the back door hanging open, watching a thunderstorm rolling in, watching as her golden retriever paced up and down the basement stairs, and the roommate's lab weaved under our feet, hoping for a smackerel of something. Canning seems remarkably easy at first blush. I'll just cook this and voila, how hard can it be? Like Snow White and her Cute Creatures of the Forest, everything will magically take care of itself. Because what might not be abundantly obvious from the recipe is that you have to first clean and then sterilize your jars and your lids. And they aren't sterile if they aren't hot, which means they have to stay hot. And you're going to have, if you didn't go out and buy the fancy electric jam maker [who has money for that?!], three pots on the stove going full bore, or have a roasting pan in your stove full of water with your jars in it, if you don't have a dish washer [Nigella Lawson says jars straight out of a dishwasher are sterile, and I believe her. But we didn't have a dishwasher] And more sugar than you ever thought you would ever have to purchase in one go in your life - grape jelly, for instance, calls for 7 cups of sugar for one batch. Depending on what recipe you chose to use. Oh, to be blissfully ignorant again.
Canning isn't for the faint of heart. Its more possibly for the slightly masochistic. Or for those that, for a double dose of redundancy, enjoy schadenfreude [especially if you're reading this and have no interest in actually canning yourself ; ) ]. Truly - it's a hot, sticky business in the summer time without A/C, so if you get faint easily, beg borrow and steal a cool kitchen. It's also not something to be undertaken at 7 PM with work the next morning and 8 varieties of fruit to be put away. All that said, the results can be epic. By epic I mean the best thing you ever ate. Because after all that work, it will be the best thing you ever ate. In small doses. The grape jelly? heaven in a jar.
I had most of the things you need to can properly when I did most of my canning with a friend at 7 PM with work the next morning and 8 varieties of fruit to be put away. Thankfully she is a night owl and was able to finish up the last batch of jam while I went home to saw logs at 12:30 AM. We're the kind of people who enthusiastically undertake a project and then realize there might be more to it than we first thought. Maybe don't try to can 8 varieties of fruit starting at 7PM. Maybe only try to can 2. A for enthusiasm, right? After the first canning adventure I decided to finish up my remaining quart bag of strawberries. I did the smart thing and brought the recipe book to the store with me, so I'd know how much to buy when I got there, since strawberry picking season is over. And lo, mangos were $1 each. And I had made [accidently] a smashing mango-peach butter a few years ago. So I bought peaches. And apricots, since they were there.
I said that when I was canning with my friend, I had mostly everything I needed to can properly. I mean that I had access to a canning bath [read: giant pot] to put the jars in for the water bath and the cage [it keeps the cans from banging into each other in the boiling water bath] for the jars and all the et ceteras. Read on.
Second Round...
I started canning at the saner hour of 9:30 this morning, and I started with strawberry jam. And I decided to put it up in large jars because who doesn't like strawberry jam? In the war of the best PB&J, it's either grape jelly or strawberry jam; of the two, there's never enough. There's no going wrong with the big jars.Except that I don't have a canning bath; I left it at my parent's house and I borrowed the friend's. I don't even have a tall stock [read:spaghetti] pot. I had to borrow something from Upstairs that barely covered my tall jars. I put a cotton dishcloth in the bottom of the stock pot, filled it with water and set it to boil. The cotton cloth was to keep the jars from sliding around on the bottom of the pan when the water began to boil. When the going gets tough, the tough improvise.
 Remember when I mentioned the three pots on the stove? This would be it. I would have put a roasting pan filled with boiling water in the stove to keep jars warm and sterile, but at 12:30 AM, I was too tired to think straight, and I left it at my friend's house. So no roasting pan. : P Roasting pan, full of hot boiling water inside the stove, would have kept sterile about a dozen of the half pint jars, or anything that was smaller than that. Alas...
That yellow stuff in the red pot would be mango-apricot-peach butter. It's pretty fabulous - I followed a recipe for peace butter and made sure I had the right final puree amounts for the recipe. In the middle of all of this, Upstairs is having a window replaced, and the fellow replacing it knows of my endeavours and has brought me 5 more jars and a packet of lids. He has my undying gratitude. [I gave his family several varieties of jam for Christmas a few years ago; methinks they might be wanting more...]


Sorry the pictures are blurry - I'm a righty and alas, I only have one right hand, which is doing all the heavy lifting and stirring. The picture on the right side is an example of a hard or roiling boil - boiling even while being stirred - which is what jam needs to be doing before you can put it into sterile jars. The jar in the picture on the right is full of water and is helpful in keeping the sugar off the spatula and in turn off the inside of the pot. The left is my valiant attempt at keeping my lids and jars sterile until ready for use.
Things I have learned and/or are useful
have a tea kettle filled and boiling. This sounds counter productive, but water is evaporating out of pots that are boiling, and the jars have to be immersed - read: covered - by boiling water. Nothing is more irritating than dropping your jars into the bath and finding out that there isn't enough water in there. So you add some water. But now the water isn't boiling because it came out of the tap. Curses. So, tea kettle filled with boiling water saves the day. I have an electric tea kettle that shuts itself off when it's done doing it's thing; it was one less thing on the stove and it was great. Also, you can make yourself a cuppa when it's all done. Because you're going to need to replenish the fluids and want to collapse. So keep a pitcher of water in the fridge and pound the fluids.
Use a larger pot for cooking the jam than you think is necessary because cooked sugar has a habit of exploding. Not like boom-kapow action movie exploding but frothy bubbly Glinda the Good Witch of the North Kristin Chenoweth exploding. True story. Also, cooked sugar burns like none other.
Ball Canning is in the business of selling things [duh]. I made do today with a knit cotton cloth on the bottom of a pot, and although a taller pot would have been much nicer for the big jars, the tiny jars were completely covered which was the end game. By reading multiple sources, I learned that some things can actually be made in your crock pot. And let's be real, it's jam. It's going to stick to everything no matter what the no-stick label claims, so be prepared to scrub after using upwards of 4 cups of sugar to a recipe.
Do your homework I have a master's degree, which means I have spent a lot of time doing homework. Like I said, some of those recipes called for 7 cups of sugar. 7 CUPS OF SUGAR!!! What if I don't have 7 cups of sugar? What if I don't have enough pectin or enough fruit or...? I discovered that there is no room for playing with the amounts in a recipe, but chances are there is another recipe out there with different amounts - so we'd consult the books before we got too far into an enterprise. One recipe for grape jelly may call for 7 cups of sugar and 5 cups of juice, another may call for 5 cups of sugar and 3 of juice plus a little pectin. Having the different sources was super helpful. It kept the kitchen panic down. My sources were the recipe section of Ball's canning website, my friend's recipe book and "Saving the Seasons" by Mary Clemens Meyer and Susanna Meyer. [The link should take you to amazon.com]
Do your homework I have a master's degree, which means I have spent a lot of time doing homework. Like I said, some of those recipes called for 7 cups of sugar. 7 CUPS OF SUGAR!!! What if I don't have 7 cups of sugar? What if I don't have enough pectin or enough fruit or...? I discovered that there is no room for playing with the amounts in a recipe, but chances are there is another recipe out there with different amounts - so we'd consult the books before we got too far into an enterprise. One recipe for grape jelly may call for 7 cups of sugar and 5 cups of juice, another may call for 5 cups of sugar and 3 of juice plus a little pectin. Having the different sources was super helpful. It kept the kitchen panic down. My sources were the recipe section of Ball's canning website, my friend's recipe book and "Saving the Seasons" by Mary Clemens Meyer and Susanna Meyer. [The link should take you to amazon.com]
The food processor is one of the best inventions for the kitchen. If you don't have a food mill. The Kitchenaid is also in my top five. Right up there with automatic coffee makers and dishwashers. I'm currently one for four.

Think it through, think it through, think it through. Put the normal stuff in the big jars and the unusual stuff in the small jars, and what you consider the super fancy and/or really weird stuff in the really small jars. And then save a few small jars for the inevitable end of the batch that doesn't quite top of the jar. Which shouldn't happen, but frankly does, because that's Murphy's law. For example: the stuff you really like or your friends really like and you know that you/they're going to eat, put that in the big jar - pint, quart, what evs, because it won't be long for the world. [This is jar A]. The "I'm testing this recipe out for the very first time, and I don't know if I'll like it" or the "Jeeze, these were expensive ingredients!" put that in the tiny jars, the goofy fancy really tiny ones, or the half pints. [These are jar B]. Why? That way there isn't a ton of it open at one time. And if you're gifting it, use your judgement on the size of the jar based on A or B. If your friends love it, give them a bigger jar. Split the recipe over A and B size jars.
Where there is a flame... there's hot stuff. You're bound to get burned, by say, boiling water splattering out of a pot. That kiddy gel ice pack with the soft, fuzzy character cover that your mom said you were way too old for? Way more handy than trying to wrap a wash cloth around an ice cube, easier to hold on to and softer than aforementioned ice cube in a dishcloth. This is what plausible deniability looks like... I may or may not own one that looks exactly like this
 |
| Add caption |
Put out the APB for jars. Seriously. Don't buy them if you don't have to. Get your friends to give them to you, because everyone has one or two laying around. So if five people give you 2 jars, you've got 10 already. Go buy a pack of lids and rings. That said, if you know me, and you're reading this... I could use some more jars...
Tuesday, July 9, 2013
koinobori - fish kites
 Lakes, rivers and streams, oh my. We pretended that the rug was a boat while we read the story [some of the boys fell overboard - that's what you get for a 3:11 girls/boy class] and we made fish kites. The kids were enthusiastic participants during the story, being cold and wet - and being thrown overboard and rescuing their friends. Perks of a smaller class size, having the space to get everyone on an 8' x 10' rug and pretend it's a boat, and guide them through imagery.
The fish kites that we made were based off of this lesson from the Smithsonian institution. For our purposes, we weren't getting into the history of Japanese internment [way over their heads], but that's a lesson I'll be keeping in my back pocket for the future. The koinobori were a project that were INCREDIBLY easy to adapt for the 3 and 4's. We talked about how kites that they are familiar with are were similar and different to this type of kite. We talked about fish and what fish need to survive. We could very easily have talked about symmetry.
The project calls for glue - we stapled the sides together on the longest, straightest side - three to four did the trick and kept a tube shape without us needing to worry about drying time - we only see some of the kids for three and a half hours and by the time we get to the activity, we're down to an hour and a half, two hours. Glue doesn't dry that fast. We also used construction paper. While the children were coloring their fish,
I read another book, "The Rainbow Fish". It gave the children another point, however inaccurate, or reference about fish and what sorts of things fish have. It made me wish I had a real koinobori to bring in - I have child size yukatas. I'll just have to visit Japan.

Regrets -
I didn't think of having fin templates. Some of the children were very concerned about having something "exactly right", and I do a lot of "Eh, it'll be fine, do your best." While I realize that for this project this is a minimal concern, for other projects and tutorials that I attempt in the future, I will need to be aware of having templates and clearer guidelines.Also, I went home to my parent's house over the holiday weekend - they have an overgrown patch of bamboo in their yard. While I'm not 100% certain that bamboo grows in Japan, or that it would have been accurate for display, I do know that bamboo is used as fishing rods, and that the kids would have loved having a rod for their fish rather than just string to carry it from. I wish I would have gathered some small bamboo rods.
Sunday, July 7, 2013
finish lines

It's been raining here in the north country the last few days, but I managed to sneak in between the sunshowers to get some pictures of these before I hand them off to the recipients.
I also managed to finish the tee shirt monster. Instead of being the intended throw size, it fits on a twin size bed. I used scraps and leftover strips of flannel from other projects to make the back rather than purchase fabric specifically for this project, since it was a project mostly about purging things I wasn't using anyway.


Wednesday, July 3, 2013
Crayon Madness
We made crayons today using my handy toaster oven, some silicon molds and broken crayons. I had to peel the paper off the crayons ahead of time myself, and got the molds from my friendly neighborhood Swedish home supply store [they have flowers, fish and stars]
 it took some jiggering to get the stars out of the mold without the stars breaking, and the crayons had to go through the melting process a few times - 200 F degrees for 7 minutes seemed to do the trick for getting the crayon to melt all the way.

We had the kids pick out the colors they wanted and filled the trays. The toaster oven was in another room with a fan running and the windows open - when melting the wax smells a bit like a hot glue gun. I also discovered that it was best not to mix materials - soy and paraffin waxes don't seem to like each other. The kids, however, were ecstatic with the end results.


 it took some jiggering to get the stars out of the mold without the stars breaking, and the crayons had to go through the melting process a few times - 200 F degrees for 7 minutes seemed to do the trick for getting the crayon to melt all the way.
We had the kids pick out the colors they wanted and filled the trays. The toaster oven was in another room with a fan running and the windows open - when melting the wax smells a bit like a hot glue gun. I also discovered that it was best not to mix materials - soy and paraffin waxes don't seem to like each other. The kids, however, were ecstatic with the end results.


Subscribe to:
Posts (Atom)