Saturday, November 24, 2012

mission fix-a-hat

well hi there friends. I discovered that, in the last two years on Blogger, I filled up my photo quota (oops), so I was trying to find a way around that tinsey problem before posting again. Because it's a little hard to post pictures of things you've made with out... the pictures. Am I right?


 so the one on the right is a little blurry, sorry about that. My grandma bought me a mitten and matching knit beret lo these many moons ago, with some begging and pleading involved on my part. The mittens have always fit, but the beret? Not a snowball's chance of staying on my head. Even after trying to felt it. Which makes me wonder exactly what the fibre content is, because the woman who made it owned the sheep, sheared, carded, washed, dyed, spun, and knit the stuff herself. In any event, this was back in the days before I was possessed of knitting skills myself, of course, so I never wore the hat. It lived with all the other winter accessories, and I ignored it. Until this earlier this fall, when I discovered, after the just keep knitting fiasco with the red pony tail hat, and found a hole at the top and thought to self, "Self, we know how to knit now, we can fix this thing so that it actually fits." Which is precisely what I proceeded to do.

I used size US 8 10" round needles, since this is sort of a bouclĂ© yarn. The beret (which I don't have a picture of) had the diameter of a 12" pie pan, so when I frogged it apart, I knew that even if I wasn't conservative with my height, I'd still have something left over. Because of the hole at the top, there were  some bits and pieces of yarn that ended up having to be scrapped, which I turned into a tassel for the top, which you can sort of see in the picture. I did not bother trying to trim the ends of the tassel to anything uniform, just letting it fall where it may. I used a basic, free hat pattern from Ravelry, with a cast on that gave me a decrease divisible by 6; and I had to frog it twice before getting close to an accurate size for my head with a bouclĂ©.   

Now I have a hat that fits that I will actually wear, and a small amount of yarn left over. I'm of a mind to find something brown and tweedy that matches the cuffs on the mittens and hat to make a matching scarf, since there isn't enough left over from the hat to make a full scarf. I do have some gorgeous variegated alpaca that I could use to stretch the left over, but I would still like to find something tweedy. 

Monday, November 19, 2012

Going Dark

I have four papers to write in about the next four weeks, and doubtless I will do some sort of crafting between now and then (I made a pair of fingerless gloves in the last week alone!) I should really focus on the school work. At least until December 12th; hence the "going dark" warning for the title. Which is really an arbitrary date; I may pop up before then. 

Speaking of going dark... this just keeps getting darker.
10/31/12
11/1/12
11/17/12 
In the meanwhile, the vanilla is still brewing away, there's Thanksgiving shenanigans abounding (I forgot the eggs for the custard for the pie at the store today - thank God there is a store, and eggs to buy from it), I'm in charge of costuming upwards of 20 participants for the Christmas Eve drama - some of which are a vanguard of angels. Vanguard, yup, you read that right. And I'm finally quilting Ordinary Time.  And maybe I'll make it to the December meeting of the Pittsburgh Modern Quilt Guild the first weekend of the month? We'll see. Depends on how much work I get done. 

Saturday, November 17, 2012

New Friends Friday, Or, In Which I Met the Cutest Pug Ever

Alas for me, the Ordinary time wasn't going together quite as I had hoped, and so I had to frog it apart to the foundations. There was a fair amount of grumbling and crying on my part, but it had to be done. 

I went on a field trip to Baltimore on Friday to hear a recital, and used some of the downtime time as an opportunity to baste Ordinary together. I had to nix using the stars in the sashing, which mean that I had to cut new sashing, and I ended up using the last of the last of the yellow fabric that I had purchased for this project. No margin of error available now, but I did keep the red points on the outside. Total mad scramble to finish the gutted top before Friday. And then we got to the farm before the recital, and there was Pudge the Pug, and ducks and chickens, and a lovely little garden, and not enough memory on the camera card, and I had to finish basting! [Or as Andy said, squirting hot liquid on it - why would you do such a thing? he said over the phone. Andy's portrait, with his bass, was hanging on the wall, which made me laugh.] 

Thank God this thing is a throw size. I should investigate a liquid basting. I think someone makes it, actually. 


ducks and chickens!!!

smoothing down the top to the batting
I had the use of a lovely little studio/office for my endeavours looking out onto the yard with the ducks and chickenses, and the help and company of a springy little pug named Pudge. Who was, possibly, the cutest little pug ever. Amen.

A little word on Ordinary Time. 

Ordinary time is a liturgical season of the Christian calendar; the English name "ordinary time" translates the Latin term Tempus per annum - literally "time through the year" - and begins roughly on Epiphany Sunday, the first Sunday in January, and pauses on Ash Wednesday [which this year, 2012, was on Feb 22 and for 2013 will be on Feb. 13 (figuring out Ash Wednesday and Easter - and Passover - has something to do with the phases of the moon)] through the Lent and Easter season, and resumes after Pentecost, until Advent and Christmas, when the cycle repeats itself. Roughly; I've left a lot of details out like Christ the King Sunday and Ascension Day, in any case, I'm not a seminarian or a theologian, or someone who is in charge of taking care of these things at church. But I am aware they exist. 

There are certain colors associated with certain times of the church calender [it also depends on whether you are Roman Catholic/Anglican, Byzantine or Russian] and green is associated with Ordinary time. Purple [or dark blue] is associated with Advent, the season before Christmas [different from Christmastide, which is white], as well as the 40 days before Easter. Pentecost and Palm Sunday are red, Good Friday is red as well. As mentioned before, Christmastide is liturgically white, as well as the Easter season [not Lent, which is before Easter] 


This is a little wrinkly, because I had it rolled up for the ride home, but you can see the colors a little better, and it's basted! Huzzah! Now to trim off the excess and get to quilting this puppy. If I'm lucky, I will have it part way done by Christmas. I feel that part way, ie half, is a reasonable goal. 

Wednesday, November 14, 2012

Worsted Wednesday - a little felted clutch

To go with a little felted bag, there's a little felted clutch made out of the hood that used to be attached to the sweater. I initially thought this was calling out to be a Kindle or like device cover, but I took a good, hard  look at my almost ballistic commercial case, and decided to nix that idea - insufficient protection along the opening in the event of a drop - and you know if it fell, the least protected side would be the side it landed on, Murphy would make certain of that. I made the mistake of surging the left side, the little red bit in this first photo, closed before felting, so it looks a bit wonky, which some creative blocking took care of. Sort of. It was already mostly closed because it's a hood, there was just that little red it open from being attached to the neck of the sweater. I don't know why I serged before, it's not like it was going to unravel in the second felting.


if you have a too long zipper, run a couple of stitches over it to create a stop where you need one.
Instant custom length zipper.


The batting is probably over kill, but I am thinking of any devices that this bag may harbour  such as a mobile phone, mp3 player, camera, et cetera, which may be tossed into the bag with out a protective case. 


a zippy closed side, and a not zippy closed side.


Attaching the flap on the zipper side and...
viola! not bad for a $3 sweater and a pair of ripped bag sale pants.

Now all I need to do is figure out what I did with my magnetic snap closures... I wish I could say I had a pattern for this, but really, I made it up as I went. The lining was very dependent on the size of the felted exterior, as you can see from the pictures, I used the inside exterior as a guide and eye-balled 3/8ths of an inch for the lining. I serged the lining closed, rather than stitch it, so that took care of the 1/4" seam allowance, and since the exterior is a knit and retained a little bit of stretch, not cutting a stringent 1/4" seam allowance around the exterior gave the interior lining a little extra room inside, which the batting later helped fill in. With the addition of the batting, it's a very sturdy little bag. 

Monday, November 12, 2012

vanilla update


the picture on the left was taken on October 31st, the picture on the right was taken November 10th. It's just this side of slightly darker. If you don't look at it directly, you can tell there is a difference. Time to start rounding up empty vanilla bottle from friends... Unless you are my friend, and you're reading this, in which case, save your empties, please, if it's destined for the recycle bin anyway.

Saturday, November 10, 2012

a little felted bag

Here, of course, is the sweater that started it all, the only 100% wool sweater at Goodwill this time of year. That was my own fault for looking for a wool sweater in November, when things have been picked over. 

The instructions were for a much bigger sweater [felting semi-instructions are at the end of this post]; they also wanted you to use the sleeves for the handles. Which is okay, I suppose. It just wasn't working for me. Also, I have to have an interior pocket, you know, for stuff. God knows when a bag is going to be pressed into service for purse duty, and I hate having everything rolling around loose. And this is an adult size small sweater, so it felted even smaller, so it's a smallish bag, so it needs an interior pocket. Enter a pair of pants from a bag sale that I completely missed had holes across the seat while I was at the store.


If I'd have known they were damaged then - daylight through both sides, right under the back pockets on these khakis - I would have left them on the rack to save room for something undamaged in my bag, but as kismet would have it, it turned out great that I brought them home; I used the rest of the pants in the accompanying felted hood project. 

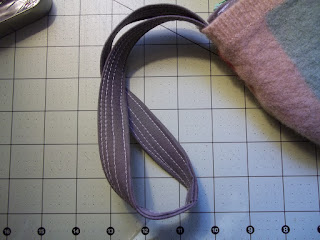
I used the other pant leg to create the shoulder straps for this bag, which are about 18" in length, so it sits comfortably right under the arm. I made a long tab to attach the pocket to the bag, and sewed it into the seam with the zipper. The straps on that side are sewn in behind the hanging tab. The pocket is almost the width of the bag - about as wide as the set of the shoulder straps.

I used an undamaged portion of one of the legs to create the pocket, first attaching the zipper to one open end, then opening the zipper, flipping the pocket inside out and serging it closed. I almost lined the bag with the pant leg, but the leg was too small for the bag, and the felt stretches just enough that I wanted to retain that slight give. Aside from the serging across the bottom of the sweater to close off the bottom, that's the only finishing I did to the interior of the bag. I did reinforce the where the straps were attached, and did some decorative stitching on the straps themselves. All in all, this project could easily be completed in a weekend if one was organized about it, with the time it takes to felt and dry the sweater and stitch up the bag.  

$3 sweater from Goodwill [and my messy desk] complete with the felted sweater bits and the dread, busted-butt khakis...


The top is a little flopsy, so the only addition I would make to this bag is a button and a loop, and it's good then I'd say it's good to go!

Addendum...

here, for your viewing pleasure, is a picture of the felting process [we have an old washer]


it's best to toss your felting project in with whatever you are washing on hot normally; items recommended for hot wash are things like towels, bedsheets, socks and undergarments [not delicates like bras] although, you can wash a felting project in cold water and shock it with a tumble in a hot dryer with everything else, like a load of jeans - it's the agitation and friction and heat that are key to getting a good felting. 

I tossed the whole sweater into the wash, no cuts to it, to see what would happen, with a load of towels, and washed it on a regular cycle, in hot water, then tossed it in a hot dryer. Was mostly pleased with the body of the sweater, wanted the hood to felt more, so I repeated the felting process, waiting until I had another hot load - I'm not going to just turn on the hot water for crafting purposes - and tossed the hood in with the next load of hot wash. You can keep felting until you are pleased with the result. If you save any pieces, it's best to iron them and store them flat, rather than toss them into a bin or something. If you think I'm kidding, try to get the pleats out of a wool kilt. Yep. Sleeves, by the way, could be salvaged into fingerless, thumbless gloves at the very least.

Tuesday, November 6, 2012

Make-it-Monday: felting sweaters


 Remember that ponytail hat that was accidently felted and now actually fits my head but doesn't cover my ears? My mother suggested that I find a wool sweater, felt it, cut off pieces and stitch them on as ear flaps and viola, I'd still have a hat without sacrificing the hard work I put into it (or having to knit ear flaps and fuss with gauge and felting them, too). So I dropped into my local Goodwill yesterday and discovered two things:

A. Goodwill [okay, some of them, most importantly this one] has implemented a student discount, YAY!
B. November is the worst time to look for wool sweaters!

This was literally the only wool sweater in the place. Which is cool, since the hat is red, and there's red in this sweater. But it's size small. Meh. It will work. But it's still an awful lot of sweater for some ear flaps... So I'm planning on turning it into a bag.

Self looked at it and said, "But that still leaves this goofy hood", and self said, "But you have a Kindle Fire that could use a cute, cozy felted sweater to match the cute, cozy felted sweater bag..." If I still had an iPod, I could make an iPod cozy for some real matchy, matchy, matchy-ness. But no more iPod. :( Sad, sad day. 


I'll be using this as a rough guide for making the bag out of what's left of this tiny, tiny sweater. It's from Women's Day, from 2005, and I'm really liking the leather straps on the solid, red cabled affair kinda in the middle. So now I'm on the lookout for a belt or something. 

Of course I'm hopeless at planning ahead, so I didn't take a picture before I dropped it in the hot water wash with my sheets and towels today. But it's in the toasty dryer with them right now, so maybe it'll get even felty-er... and smaller... one can hope. Which will make for a really tiny bag. Details. 

Sunday, November 4, 2012

tee-shirt monster revisited

Mostly because I had the fusible interfacing coming out my ears, wanted to know if I could throw one together, and because they [the tee shirts] were taking over my life, for these three reasons, I had to do something. So I made a quilt.

Okay, it's still in pieces. Semantics.


It wasn't until after most of them were cut that I said to self, "genius, try cutting a common size" - I went for "get as many in here as possible" rather than have a perfect grid with several squares of mostly 10" of color with a tiny logo in the corner, or an oddly balanced square because of where the design fell in relationship to the neck and arm of the shirt. I've seen the adds for this type of quit, and most of them just look really strange to me [see the neck/arm reference], which is why I have a sort of pinwheel in the middle. I could have planned it better with the other small bits, but admittedly,  they showed up after the fact, having been cut out a very long time ago and gotten lost. All this is just great experience for  that great day when someone utters the inevitable, "Hey, can you make a tee-shirt quilt?" I did finally wise up and start trimming things to a uniform size, at least a length, so clearly there is some continuity among the pieces. A few I had to make up the difference with sashing.


This will end up being a nice throw size, and it will have no more than a 2 1/2" border around the outside in the same sea-foam-y green, and will, at some point, be machine quilted.


Some things I learned from this:

  • evaluate the design on the shirt first, and assign it to a "small, medium, large" et cetera system. Tipping the "Del-a-Where?'  and company on it's side works with the strip placement along the bottom only because the others are tall and skinny. 
  • have a pre-determined cut-to size, and base it on the largest design [hence the small, medium  large, et cetera] It will make the piecing go that much smoother.  
  • be careful about the heat setting on the iron and the silk screen design. Some of the designs smudged under the heat of the iron, so I had started to press the interfacing with the silk screen against the fabric of the ironing board, and the iron against the interfacing. 
  • Whenever possible, keep things going the same direction. 

Saturday, November 3, 2012

a little lap robe


I'm not going to say this is the saddest, sorriest affair I've ever made, but I certainly wasn't being particularly careful when putting it together. I was deliberate in arranging the colors, but not the placement of the blocks once they were pieces. It was tied to a piece of red plaid flannel, and it lives in the trunk of my car. Maybe when I have more time, I'll revisit the pattern and edit the assembly.