Showing posts with label fabric. Show all posts

Tuesday, May 12, 2015

Brining for dummies

As I was trolling Pinterest, I saw a post about brining, looked at it, thought 'oh, interesting', filed it away in the grey matter and promptly forgot about it.


World Autism Awareness week is the last week of March into April and in the United States, national autism awareness month is April. A project I'm working on currently for two brothers uses flannel and denim. Before I send these out, I will prewash them, but it occurred to me that even after prewashing, the denim and flannel will, for an individual with Autism, be stiff and rough, more than to a neuro-typical.
 

So I decided to brine the denim. What is brining going to do to it? Its going to soften it up, hopefully way up. People describe the softness as 'vintage' which brings to my mind broken in and washed. A lot.
Ratios for brining a single tee shirt were available at octane shop, but I have at least two yards of upholstery grade denim. A quart of water and a half cup of salt were not going to cut it.

When making brine, I recommend using warm tap water, and if you've got a rinse sprayer, put the salt in the container first and spray it. This will help the salt dissolve in the water, giving you a better brine. Yay brine. (In case you were wondering, that is a half gallon mason jar I'm mixing water and salt into. it was $0.79 at the thrift shop.).


This is a gallon and a half of water to two yards of fabric. Not enough water. 


At left, two gallons, right, three. I put the empty jar in there to help weight it down and keep it under the water.


Mark the calendar, wait three days aaaaaaaand...

Toss it in the wash. Put it in the dryer. Poof. noticeably softer denim.

Saturday, October 12, 2013

a box-o-baby wipes: a toy story

my friends just moved into the city, and they have a little girl who has taken to calling me "Myzara". Myzara, came across a toy that she's going to make for the kiddo who calls her "Myzara".


It involves an empty baby wipes box and fabric scraps, a specific baby wipe container with a button and a rubber opening. Guess who has lots of fabric scraps. Okay, so I don't have an empty box of wipes laying around, and neither do my friends, since they just moved and were in the business of leaving as much behind as possible, so I might just buy a box of wipes and gift them with the wipes as well. But it isn't as if my friends aren't going to need the wipes as well.

You will need:

  1. a Huggies box of wipes [empty, preferably. Or not, but if it's not, take all the wipes out of the box, put them in a gallon ziploc bag, and give the wipes to the parents of the recipient]
  2. 25 or so assorted squares of fabric.
  3. scissors, preferably pinking sheers [they will make crinkle cuts]
the pinking sheers will help keep the edges of the fabric from fraying.


I did this project with a little help from a friend who has an amazing stash, which is where I got some of the fun novelty prints from. I mixed in some flannel for some fun sensory things, too.  And then found out that the flannel sticks to the other fabric, so for as fun a feel as it is, it hampers the whole "let's start pulling fabric out of this box!!!" concept. Which, when you are two, is ultimately what you want to do.


Monday, September 23, 2013

quilt along. or something.

Mystery Quilt - Tranquility

In the  choice between doing an online bee and a mystery quilt, doing a mystery quilt along won out, for several reasons. Mystery quilt doesn't involve paying for postage. Or driving to the indy/ specialty fabric store and buying 'modern' fabric. I can use stuff I've got laying around my house. Until I have a paying job offering disposible income, this seems like the more responsible of the two choices [as fabulous as it would be to get a package from out of state or potentially internationally].

I've seen mystery quilt-alongs before, and I've always thought to self "but what if you get done and you hate it?" This is the chance taken when signing up for anything with an unknown outcome. In the battle between "but what if I hate it" and "just try it", the urge to just give it a shot won out. This project requires three color values, which I was able to scrounge up from my stash. Like the majority of my work, it's going to be a scrap quilt, but hopefully with a slightly more unified, cohesive feeling. Maybe someday I will go to the fabric store and buy more than 1 yard of something at a time. Really go wild and buy 3, with the intention of using it on the top and not the back.

There is also a time deadline to this project; the moderator gave 2 weeks to finish cutting and sewing the squares, and I'm a little behind, partly because of the scrounging. Shout out to Center for Creative Reuse for their fabric section and the yardage I found there for $1.50 that matches the colors of this project. Honestly, I don't know what I would do without places like CCR.

Here's my fabric selection, which is still in a state of uncut. I need to get on that at some point.

Tuesday, August 13, 2013

British Invasion

Once again Loom stands and delivers. Incredibly fortunate to have a cotton quilting fabric store within the city limits of Pittsburgh, Loom is one of the first places I stop if I'm looking for something. Of course, it's not just a quilt shop; pure serendipity that they have cotton quilting fabric as well as other textiles.
Admittedly, I did not get the Union Jack panel from Loom; that came from a shop online. They (Loom) did however have both of the other Riley Blake fabrics pictured above.

This product is for a relative; I didn't start making baby quilts until probably the third baby come along, so there are three outstanding projects. Happily, I can guess what will please one of the three. 

Sunday, August 11, 2013

a canning adventure addendum

Blueberry love. Blackberry love. Peach melba love [you read that right]. Love, love, love. I saved the boxes that the jars came in have have them stacked three deep in the cellar - soon to add a fourth, because some kind soul gave me a 12 pack of sealed 8 ounce jelly jars. There are still blackberries to process. While dog sitting for a friend, I reprocessed my grape jelly which had turned into syrup, and it became so thick a jelly you now have to cut it with a sharpened knife. Maybe I'm going to cut it into squares, cover it with chocolate and give it as gifts... Up next will be kiwi daiquiri jam, when I lay hand on some 4 ounce jars. And maybe some champagne blush, done up with a spumanti or muscato and some blackberries. Because I think that sounds fabulous.

I processed the blueberries I picked a few weeks ago with lavender [and vanilla] using this recipe from Serious Eats, and I split the batch with a friend who bought the jars and supplied the sugar and the kitchen. I was initially concerned about what the lavender would taste like in the jam, but it isn't overpowering; it's just a little "hmm, what could that be?" that is loverly. We added the vanilla for the second go round, one tablespoonish.

We came out with 8 jars a batch as specified by the recipe, and it's low in sugar. Which is great, since everything else in presently packed in my cellar will send you into diabetic shock... I'm only half kidding.

What I discovered about living in the city is that one cannot procure 4 ounce jars for love or money, from anyone. And for reference, four ounce is the one that says blueberry lime jam on the lid - it's the tiny short one. The two in the middle are eight ounce jars [one is labeled and the other is filled with Apricot Peach Mango goodness]. The one in the back is a 12 ounce square-ish side jar. That one is tutti-fruity mash up. I digress: 4 ounce jars can't be found in the city unless they are from Italy, in which case they cost an absurd amount of money and can only be bought one at a time. This, I feel, is insane. The next time I go picking berries out afield, I'll try to stop at the local hardware or big box store and pick up a flat of tiny jelly jars. Down side of city life : not everything your little heart desires is available, contrary to popular claims. I did find wide mouth pints, which are short like the 4 ounce, but are obviously bigger. Cost prohibitive. Also not what I was looking for.

Because I ran short on fabric for a project and will have to get some more for that one, I was thinking that, since I am planning on giving this as gifts anyway. it might be fun to find fruit fabrics with the type of fruit featured in the jam or jelly. Since I'll be out there looking anyway...

Friday, August 9, 2013

seeing green ... or "please don't make me have to find and buy more of just this fabric"

I meant to buy plastic bins to store in progress projects in, or at least, the fabrics... right now my studio apartment looks like a fabric shop exploded. I have three quilts being pieced right now and one on the hoop. It's a little nuts. Also, I ran into a little problem. More accurately, a shortage problem. One where I didn't buy quite enough fabric to finish a project, I've got nothing that matches the description in my stash and the shop I bought it from is 25 miles away. Ish. I really don't want to drive that far for a number of reasons I won't bore you with. That said, read on.

For the green Moda variation quilt that I am currently working on [picture provided for reference of the original],
I wanted to sash my nine patch squares with a solid green. I have 4 different shades of green. 13" of one, 30" of another, 18" of another, kissing 36" of still another [and another piece that matches one of the mentioned colors that is almost 2 yards... so we'll save that for the back and piece something together] making a total of 97" of useable solid greens to sash the 9 patches with.

My nine patches are 7 3/4" square; each block needs two [2] short green strips and two [2] long 12 1/2" strips to sash it. Which, when I discovered at 11PM, is where things got interesting and I realized that my initial plan of having a 6x6 set might not be necessary. Especially since a 6 x 6 block set of this size won't fit in my living room. Also, I'm not going to leave white space between my blocks in the border. There's more than enough green in my stash for an entirely green pieced border to go all the way around. And I don't have enough of my background fabric to create that. [And someday, I'll be teaching grammar and the fine art of writing to small children. ;)]

The Moda website only specified having two jelly rolls for this recipe, one of print and one of solid. They mentioned a half yard of coordinating fabric for "border" and an unspecified amount of yardage for the back [their's sizes out to a twin] I purchased 2 yards of a creamy fabric to use as the equivalent of my plain jelly roll. Just looking at this thing, one jelly roll did not seem to be sufficient to accomplish what they claimed it would set out to do, and no one seems to know exactly how much fabric is in a jelly roll. REALLY?!
A side note about the other difference between the Moda directions and what I'm making... I'm not cutting to jelly roll width, which is apparently 2 1/2". I'm cutting everything by hand and went with a 3" width for my strips, which made the overall size of this project bigger anyway.

This one's gonna be close...

I started cutting the length of the fabric, six strips the length of the two yard cut so I ended up with something a little like this...
see what I mean about not fitting in my living room? and this isn't the whole thing

There is no room for strips 5 and 6 to go on the ends, but they are cut - I know it'll shrink up a bit when it's sewn together, but it will have to be sashed some more after that. I cut long strips mostly because I hate piecing. Had I known at the cutting counter that asking for two and a half yards instead of just two would have yielded me exactly what I needed to make non pieced strips for the outermost border around the pieced square border and all the short little cuts I needed, I would have gotten two and a half yards. But I don't do that kind of math. Certainly not in my head on the fly. Ultimately, I didn't cut from selvage to selvage for any strips 44", I cut the entire piece of yardage into long strips.  Since there is only about 27" of the cream boarder fabric left, I'm just going to leave it off and either try to buy more from the shop I got it from or start with something else.


This creamy sashing fabric looks so much better in person; it has a subtle greet pattern [one of the reasons I picked it]. I'm not sure why that is. The looking better in person than in a photo bit. I used all 97" of solid greens for sashing... there was a little bit of waste - a rough inch shaved off here and there with maybe one or two extra sashing strips and was, without planning ahead, able to create the X pattern. Which you can't really see in this picture because the living room is small, the picture is cut off, and the upper left most corner block is actually sitting on top of the grey bin.
[I apologize for the creepiness of the Lyd in this picture. She doesn't usually look possesed.]

Sometimes I'm terrible at visualizing things, so I brought the w.i.p. top over to a friends house who has double beds. The top is presently set as seen in the picture above... and it fits on the top of the bed! Which means that with the solid border and the pieced border and all the sashings, it will look great and fit on the bed with a little extra drape. All was fabulous until I got to the second to last border, where there was enough to go sash two sides, and no more. And I discovered that I actually needed something more like 3 or 4 yards to accomplish this sashing task [the 4 accounts for matching binding]. The good news in that I have about 10 months before I need to have this quilted, so I have my winter project cut out for me. Also, when the recipient upgrades to a bigger bed, this thing will still fit. As long as there is no upgrading to a California king or something.

And in case you were wondering, here is the link to the origional project: Sweet Menagerie Nine Patch

Thursday, August 1, 2013

new shop!!

there's a new shop in the Metro-Pittsburgh area!! In Sewickley!!! It's grand opening is tomorrow!!!!

Why am I so pumped about this? For two reasons - first, there aren't any shops on the west side. Well, not indy shops, anyway, there are big box retailers. Second, when I first moved to the 'burgh four years ago and would drive through Sewickley, I'd always have to remind myself there wasn't a shop there, and there was much grumbling and lamenting involved. Why?

Jennifer Chiaverini.

I can't remember which book it was that she wrote, but one of the novels featured a quilt shop in Sewickley, Pennsylvania. Fictitious, of course. It is incumbent upon me to add that -at the time - not only was there not a shop in Sewickley, but Waterford, PA isn't in the center of the state. It's fiveish miles from the college town where I grew up. I mean it in the nicest way possible when I say batting 1000, dear. [Also, there's no quilt shop in the actual Waterford, but there is one in Cambridge Springs, which isn't far from Waterford - Jennifer, you should come visit if you haven't. It'd be neat. And the area is passable to the Waterford you describe in your books. Actually, we felt right at home when we read the books, except for the proximity to Lake Erie]

So imagine my delight when I learned that there is FINALLY a quilt shop opening on the west side of the city. And it's in Sewickley. It's nothing like the shop as described in the book. This Sunday it will be hosting Pittsburgh's own Modern Quilt Guild's meeting. I'm not actually lying to myself anymore when I say "Keep on driving, there isn't a shop in Sewickley... grumble grumble grumble... There should be a shop in Sewickley... grumble grumble..."

STITCH ... studio and shop. Cheers to the proprietor!

Friday, July 26, 2013

two for one special, or beware of friends bearing macy's bags

I have quilt tops languishing in limbo, waiting to be finished, and while they are waiting to be finished, I'm working on other projects that need to be finished.

Like a green nine patch. Which doesn't need to be finished but does. If that makes sense. I'm basing it loosely off of Moda's Sweet Menagerie. Loosely for several reasons. First, I had a bunch of green stashed away and wanted to do something with it, and I'm not using the two jelly rolls called for [some jelly rolls have 40 strips and some have 42... seriously people? SERIOUSLY?! are there no industry standards anywhere?!] I'm making it up as I go along, figuring that with something in the neighborhood of 20 fat quarters and an odd assortment of random bits of yardage beyond that, I'm probably good to go. Also, jelly roll strips are cut at 2 1/2 inches wide, and I started cutting 3"... so my quilt is already going to end up bigger. Don't ask me how much. I don't do percentages and I can't even tell you what kind of math I'd need to figure out how much bigger my quilt will end up being from theirs if each of my squares is going to be 1/2" bigger. It's why I love 1st grade math. The green nine patch will have it's own posting at some point, and likely instructions... if that's not copyright infringement?

Second, Moda's is a twin quilt. I want a double, so I need at least one, if not two more rows of squares. Imagine this picture with not 4 x 6 squares but 6 x 6 and that will be my quilt. Ish.


Third, mine will be all green and a little less organized, if you can't tell from the picture of my squares. My nine patches will be sashed with a solid green instead of a print. Instead of white, I'll use a cream print [the Moda site said one jelly roll of white. I have two yards of a cream. That should do it, right?] I'll keep the solid border, but it'll be green [surprise] Instead of a checkerboard, it will be whatever is left over of the sewn together green blocks and the assorted leftover green yardage [that didn't make it into the nine patches], of which there is a lot. Allofthemtogether. I have a Peter Rabbit square that I'm going to throw in there as my humility square. Because it has green. He looks so chill, chillin' on his cabbage. I don't do kitch, but I've got my reasons for Peter Rabbit.
 
 that there is my pile of nine patches, pinned up and ready to be stitched together.


I was gifted with a Macy's bag full of fabrics, and part of that was a partly finished quilt. I. Hate. Sewing. Stars. I hate sewing triangles and I hate putting together triangles. I would not have picked this. I would have seen the picture and said "oh, that's nice" and kept right on moving. But I've got this, and I'm going to finish this. And all the little stars, too. In all it's patriotic glory. There's more to it than this, a stripe and checkerboard motif that looks a little like a flag bunting going all the way around the outside. I'm not sure if this is something I'll keep or if it's destined to become a Quilt of Valor. This is just one of those finish it and see what happens. A whole bunch of patriotic fabric came with it, and whether I keep any of that remains to be seen as well. The local branch of Project Linus was flooded in the recent summer storms, and they are in the process of cleaning out; it's possible I may donate some fabric to them.


Sunday, May 19, 2013

fabric image transfer part 2: ironing

So, you made it back! What's this all about? This is the second instalment of a tutorial on how to make fabric sheets for your printer.  The first instalment dealt with how to treat the fabric so that the colors would set and not bleed or run when exposed to water. Or coffee, tea, any other liquid. If you StumbledUpon this, or for whatever reason can't scroll down to the previous instalment and you are curious, here is image transfer part one. Of course, if you have a laser printer and not an ink jet, you don't have to worry anyway - you just have to load the fabric sheets. And I envy you. For the rest of us, we have to take more drastic measures.
If you're new to this, and you want to make a printable fabric sheet for your printer, what are you going to need? Do you want it to be permanent? See part one first. But I'm using professional photo inks, not the cheap-o ink cartridge, you say, it'll be fine. Trust me. You need to be a little more drastic if you aren't using a laser printer.Give photo ink development a few more years, and we probably won't need the stuff from the previous post. If you still don't care about it being that permanent, keep reading.

Materials

  • Fabric [100% cotton]* - I can't stress the cotton part enough - why later
  • Freezer paper [it does have to be freezer paper]
  • iron
  • ironing board
  • fabric scissors or rotary cutter, mat 
  • [acrylic] ruler
Okay, why 100% cotton. When you go to the store to buy your fabric, there are going to be a bunch of choices for you. You may even ask the sales associate for some assistance. And not to insult their intelligence, but fiber content might not be their specialty. Paint or crochet might be their strong suit. So why cotton? My first, first go round with an image-onto-fabric, I bought a 50/50 cotton polyester blend. And when I went to iron out the wrinkles, the squares puckered because the polyester, which is basically plastic, melted. And I didn't have my iron set to the highest setting. Cotton will not do that - the label on the bolt of fabric will tell you what the fiber content is [your clothes will, too, what they're made of].  I was using a different medium than the one described in part one of this tutorial - I've had much better success with this.

Procedure

First, figure out how wide your freezer paper is - the box will tell you this - it'll be the smaller number. Mine is 18" wide. When I cut my fabric, I cut from selvage to selvage - these are the finished edges - giving me a strip of fabric that was 45" long, and I cut it 18" wide so that I had something the same width of the freezer paper.

Then all I had to do was cut a 45" long piece of freezer paper. Now, iron the two together.

This part takes a little getting used to. The setting on the iron will need to be set high for cotton. Unless you bought a 50/50 cotton poly, in which case tone the heat down. Make sure you are ironing with the paper part of the freezer paper on the board and the coated part of the paper touching the fabric. The freezer paper will not immediately bond to the fabric, so just check the edges to make sure it's binding. Continue ironing the whole strip; you can go back and check for air bubbles later, working them off towards the edge. Once you have your strip, you can cut off whatever size piece of transfer paper you need. Need a banner? You are set. Want to print two images that are 6" square side by side with some space between them? Oh, hey, you'll need a piece of fabric longer than 11". And you can do that. If you'd have bought the pre-packaged deal, no such luck.

I will post a third instalment a little later on running these through a printer. Keep an eye out if you're interested. Maybe track down friends with photoslhop/ a nicer printer than yours if you don't have it and consider shamelessly bribing them with food/babysitting/dishwashing/a new ink cartridge

Hey there Miss O, where are the pictures?

I'm working on that. I had a busy weekend. I helped move a house, a friend graduated There was a lot of catching up with a lot of very important people, not the least of which was 23 of my students and Miss Honey... I may have strep now... of course, it may also be something less drastic... You'll get the tutorial pictures, gimme a chance to recoup. 

Monday, May 13, 2013

image transfer - a tutorial, part 1: treating the fabric.

As stated in some of my previous posts, I've been toying around with transferring images to fabric. In the most basic of ways. I'm not trying to layer images on top of each other or anything fancy just simple, basic here's a picture, now print.

There are image transfer sheets which you run through your printer and then iron on - this isn't what I'm talking about. There are also prepared fabric sheets that you run through your printer and peel off a paper backing. This is more along the lines of what I'm talking about. When I went to price the prep-fab sheets, they got very expensive for a large scale project; the pro is you pull them right out of the package and they are ready to go straight into the printer; they are, however, pre-cut to 8.5"x11". So if you have access to a bigger printer or [oh, boy!] a plotter, this might not be the way to go. Another considerations is that the pre-made package sheets are made of something called percale - this is the same thing that your bed sheets are made of. It is a denser weave than quilting fabrics, which is great when you're sleeping on it, but not so great when you are trying to sew it together with something else - quilting fabrics and bed sheets generally do not get along with each other. You can make it work... but, sometimes, there are problems, either immediately or down the road.

My purposes suggested that making my own fabric sheets would be the way to go. Why? I could cut strips and then cut them to any size I wanted to - say 8.5 x 10, for a little less waste, I could use coupons and my teacher discount to the big box fabric store to get 100% cotton bleached muslin at a discount, and I could experiment with color settings without racking up the cost of the premade pages [there is a slight color outcome difference from paper to fabric that has to do with the fibers].

If you want your picture to withstand the rigors of water and washing, read on. I will be posting about how to just create fabric printer sheets in a second instalment, and will link directly to that [but if you want them to be permanent, you'd better do this, or have/know someone with a laser printer]. This is labor intensive, but like many things, might be worth the investment depending on what your project is.

To make your own quantity of washable fabric printer pages, you will need the following materials:
  • fabric* [100% cotton is best]
  • freezer paper - whatever brand you can lay hands on, but it has to be freezer paper.
  • an iron and ironing board
  • a large-ish plastic bin, preferably with a flat bottom
  • plastic/rubber gloves [whatever you aren't allergic to - I used the yellow dishwashing uppity storebrand ones from the bullseye store]
  • a drying rack or a flat area that can be covered with a plastic sheet 
  • Bubble Jet Set and Bubble Jet Rinse. Why Bubble Jet Set? I don't know the chemistry behind it, but it helps set the ink from an ink jet printer [this is different from a laser jet printer]. When ordering it, order the rinse that goes with it, because you have to wash the images after they've been printed to set the color. [You can find Bubble Jet Set + the Rinse through on-line retailers]
  • Your favorite fabric scissors or a rotary cutter plus mat and acrylic ruler
  • a small funnel is handy, but not necessary. I strongly recommend the funnel though. You'll see why.

*Some notes:
I simply wrote fabric - remember, we're going for quantity here, not three sheets to a package. When I brought my yardage, I purchased a yard and a half of bleached muslin [this is 100% cotton] at the store - which works out to being . found it helpful to cut my fabric to the same width as my freezer paper, which happened to be 18". The length is inconsequential, since that can be dealt with later - remember, you could set your printer to print a banner if you really felt like it, and it would feed a long sheet of paper through happily without a hitch. I cut my fabric 18" wide - the width of the freezer paper - on bleached muslin yardage, and I cut it from selvage to selvage [this is the finished edge], so that I had strips that were 45" long, the width that fabric fabric is woven at.

I can hear a question now - how many sheets did I get out of my yard and a half? The following are the pictures of the second half of the yardage. So I don't know until we're done with the tutorial. The first batch made 10 sheets with some waste.

Also, set your iron and freezer paper aside - you won't need them for a good while. But you will need them.

Procedure


 Step one:

Assemble EVERYTHING in the same place you intend to prep your fabric in. Doing this in a place with a linoleum floor should go without saying, not because the Bubble Jet will stain the floor, but because linoleum wipes up easily.

My bin isn't quite the right size for my fabric - I measured for my freezer paper, not my bin. But this won't be a problem. The goal is to get the fabric to take the Bubble Jet, and keep everything contained.

 Step two:

put on those plastic gloves and put one end of the fabric strip in the bin. The rest of the strip can be trailing on the floor or work surface - the liquid won't be drawn up the strip and out of the container. Pour some of the Jet Set in the bin on the fabric and start rubbing it into the fabric - you can see the dark spot where it's taking. You will need to rub it in, it won't just soak immediately like water. Once the end has been saturated, take the strip and fold it over the bin so that a new dry section is laying over the end, and the tail is hanging out the opposite side of the bin.


Step three through... whatever:

kinda like these pictures - flip from one side to the other. Don't pour any Jet Set yet, just start rubbing the dry fabric into the wet beneath it to soak up any excess liquid. [This way there is less waste!] If you discover that it's too dry, pour a little Jet Set in and keep rubbing until the new layer is damp. Fold the fabric strip over so that a dry layer is laying over the wet one and repeat the process until you're at the end of the strip. This isn't a "use more, better outcome" kind of thing though. It really is about getting the fabric damp, because it's just going to drip off. 


TA DA! End of the strip! By the time you get to the end, you shouldn't need to pour any Jet Set into the bin - the layers below should be wet enough that rubbing and pressing the dry layer into them should be enough to get it damp. You can wring this mass of fabric out a little bit into the bin if you suspect you might have poured on a bit more than you needed.

Last step:

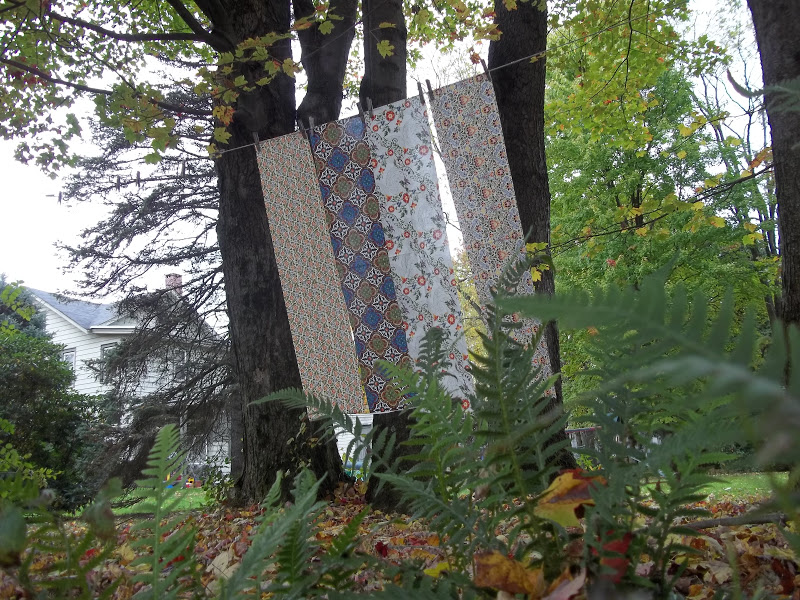
I have a drying rack, so I hung mine out, and yes, I had a lot of dripping going on this go round. Rather than have a mess on my floor, I propped my bin up over the bottom brace of the rack with soup cans to catch the drips. This is where having a funnel is handy - once the fabric is dry enough that it isn't dripping any more, take the bin away and pour the excess back into the bottle to use for the next project. This dried really fast; it dries faster than clothes from a load of laundry set out to dry [or maybe it's because this sits right in front of the furnace...?]. Hypothetically, if you did this first thing in the morning, it would be ready to iron onto freezer paper by lunch. Or right after lunch. If you were in a crazy hurry, you could do this in a day if you timed it right.


Once it's dry and you aren't busy, this is the part where you want the iron and freezer paper and scissors - know where those are? Oh, well, I'm in that boat, too - go find them. I'll be back later with image transfer - a tutorial, part 2.

Saturday, April 27, 2013

road runners, coyotes and shopping for fabric [it's not all I do]

You know what's hilarious? finding the blog you started as an undergrad. Until you realize you kept it for 6 years and you forget that it's you you're reading about. Oh, the drama...

Everything is over now. There's no more student teaching, Grandpa is dead, and graduation is next Saturday. I came in for landing, but I didn't really land. I bounced, or I landed, but there wasn't enough runway and I fell off the cliff at the end [only in a cartoon with a coyote would anyone do that] because I came in with far too much speed. Or I crashed into something. One of the two. It's funny how saying it doesn't make it any more real. 

I was picking up basic groceries at the store on Thursday, after having already been to the store on Tuesday, when a friend called to see if I wanted to get dinner, and I tried joking about it  - who goes to the store and buys yogurt and cottage cheese, but not milk, and cinnamon toast, but not the regular bread? And completely forgets the eggs? Basics sit right next to the frilly stuff! It's not like I go without a list, I just forgot the list. [I also seem to be at or just coming from the fabric store every time she calls...]

All of this leads me to believe I'm going crazy. Or, at the very least, need to get out more and interact with adult humans. So later on Thursday night, I made plans to go out on Friday with the youngest of the quilting Graces - I'm not entirely sure how old she is, but I'm pretty sure she's younger than my mother [she has kids my age]. She announced it was "take a graduate student to lunch day!" - It's on my calendar, she said, and I thought, oh, hey, I know a graduate student! [I, for my part, laughed.]
There is an amazing fabric shop in Finleyville that we drove down to - Beth was looking for fabric to "whip up a quilt to be on the bed while I make a quilt for the bed", and the background fabric for the quilt that's going to be on the bed - it's called twinkling stars from Kaffe Fassett's new book Shots and Stripes, and it's going to be beautiful; Beth does marvelous hand work [her's will be a dark navy background]. In case you don't know, fabric is typically woven in a width of 45", and then sold at lengths of a yard {36"} [in the States], but if you're making a quilt, you can get wider yardage, 108" wide or 115" sometimes, and the Finleyville shop has the largest selection of 108" backs in the Pgh. Metro area. Okay, they just have the largest selection of everything, hands down. Anyway, why is this wider yardage important? You don't have to go to the trouble of piecing the back. You just ask for three yards and boom. Done, you're on your way to quilt sammich heaven. 

So while Beth was pondering which blue or brown would be best to highlight her scraps, and finding every toile with a bird on it for her whip-up-quilt, I was looking at the large scale red florals for the gypsy throw [at least, I think it's still throw size], and just browsing. In general. Thinking I was done looking for stuff for the school quilt.  But no! Thursday I'd gone to the North Hills to Joann's looking for this magic stuff you soak fabric in and then run [the treated fabric] through your printer. Joann's didn't have it, so I ordered it online, and it should be here on Monday. I found this fun stuff...


Rocks, The Very Hungry Caterpillar, tulips, math facts [including fact families!!] and plums. After talking to the other Graces on Thursday afternoon, I changed up my game plan for the quilt significantly [which is still rather amorphous]. There may now be appliqué involved, but that gave me a better idea of how big it would end up being. Or small. Whichever. Since I'd like the final product to be a surprise, and I think Miss Honey still reads this [?], I'm not posting a drawing of my potential plans. 

Beth reflected that it sounded like I was in mourning, which she quickly retracted [I haven't seen her in four months] - you are, and it's healthy, and it's okay; three things I've been very emotionally invested in have just ended. Go sew something, she said. Go home, wash your fabric and sew something. Do you have something you can start sewing? I give you permission to sew something. It's the weekend. No one is in their office, so calling and obsessing and panicking aren't going to do any good anyway. And the job in Maine isn't going to happen. That packet isn't making the [literal] boat, but yes it was great practice.  Everything is pulled together for the next one.

I feel like I should be emotionally over all of this and moving right along and smiling and fine. I've been wandering around my very tiny apartment alternately cleaning or tearing things apart to organize. You can only clean so much before something is cleaned within an inch of it's life. There is no more grindstone to put the nose to, but I can't get out of that mindset and let myself do something I like doing. I feel like running. It's not a good sign. 

Wednesday, March 13, 2013

for that day when you're not busy making plans...

the swatch ruler says these flowers are 4" across... I think they'd go well with the other flowers in the gypsy throw.


I wonder if they swatch... these pictures aren't color true. Really, what I should be looking at is a red or plum to finish it off around the outside. I have all the floral I need.


Saturday, December 29, 2012

sarah's gypsy throw, deux


Not enough time over the holiday break to get anything accomplished, not nearly enough time. Ugh.

I was down in the Strip District buying a few last minute things before Christmas and I popped into Loom, having had a gander at their website. Lo and behold, this Phillip Jacobs material called "Summer Tree" was on sale for $4 a yard [!!!!] so I got half a yard of each in the teal and yellow colorways - and picked up half a hard of the orange and red poppy fabric as well.

Mom and I were going to hit up some of the fabric shops in Erie, Bradford and Cambridge Springs, but alas, they shut down for the entire week I was here, so I settled for spending my Christmas money at a big box store instead. LET IT BE KNOWN THAT I LOVE SUPPORTING SMALL BUSINESS, but I can't do it if they aren't open. The big box was excruciatingly disappointing in the way of batiks, which comes as no incredible surprise, but I was working with the time and materials I had, not really wanting to put this off for 15 weeks - it's is so close to being done!

Because of the extra yardage I bought at the big box, I ended up with a multitude extra squares. The instructions in the book indicate that the finished size of the throw should be 69" square, if the half triangle squares are cut to finish at 7" when sewn. My thought was that I could add an additional round of half blocks before the final border, just to finish off all the leftover blocks. This would take it out of the throw category and put it's diameter at 83" square, which is more fitting a double bed. If I widened the exterior border, I could make it 90" square, and it would qualify as a double.

If there aren't enough half squares to make it all the way around, I would just do one side, which wouldn't make it square, oh tragedy, and the left overs could be used in the backing.

None of this is not a bad thing.

Monday, December 17, 2012

it is finished...?

It's pushing 9 EST, I haven't heard anything from my paper partner. It was raining today, and with our house being on a north easterly side of a hill, it got dark, faster than usual, so I lit the not-so-Adventy colored candles on the wreath, plugged in the tree, lit my festive pine scented candles, and turned on every light in the apartment. Even the festive bush is having a hard time burning against the darkness tonight. I must say, I am more appreciative of the warm incandescence of the filament bulbs outside than the cool glow of the white LED bulbs that grace my indoor tree. But I was rather hoping I wouldn't have to bother replacing bulbs - question: if we are capable of producing LEDs in almost every color of the spectrum, why is it so hard to get a bulb that isn't a cool white?

but I digress.  this is the world's worst photo ever, so bear with me. I have a friend with a[n even bigger] fabric problem [than I have], and she invited me over to go shopping in her stash. So I did, before student teaching happened and my life became a giant question mark. I've been sitting on a borrowed Kaffe Fassett book from the library, featuring projects from the V&A Museum in London, England. Featured on the first page of the Utility Quilt set was a brilliant red and black affair based on a homey pink and brown quilt which caught my eye, made according to the book, by - or more likely for- one Sarah Wyatt in 1801 [though the V&A website does not corroborate this detail].


I had to make it. Now I have the fabric to do it.


So out of the king sized pillowcase stuffed full of fabric, I carefully sorted the shades of cherry, cayenne, magenta and purple would I thought would work best for this project, as well as large scale florals. That lovely swath of purple is going to be the inner border you can see in the picture on the left page.

This doesn't do it justice, but you can see the strip piecework 

I also started cutting out this project, and then found to my dismay that I didn't have nearly enough fabric for this (I suspected as much) so I sewed some of the blocks together and I trimmed some of the scraps to make squares, which made for interesting patches themselves. The rest of the squares are hanging out until I purchase the rest of the material, so it doesn't look as obvious that I'm adding new fabric mid project. I did throw caution to the wind and just make the middle though.

As irritating as it is to have to sit on it and wait for the funds to buy some more red and magenta tones and large scale floral... no, it's plain irritating. It's an incredibly simple project, though the color combination is by no means staid. If I felt like it, the top could be done before Friday, but it won't be. 

It's not something I would have thought to make; at least, not with these colors, which make me think I've broken jars of saffron, chilli powder, curry and paprika; it reminds me of a feast, of a broken open pomegranate, with it's glossy, garnet seeds. 

Saturday, December 15, 2012

finals are cramping my style

ten days 'til Christmas. Clearly, you can discern my religious convictions and affiliations from that statement. You know what's not done? My Christmas present quilt isn't done, that's what. 3 squares out of 12 are done. I'm not going to quilt the corner blocks at this rate, which will make the question of where to affix a label easier.


The two in the middle, I think, are done, plus one on the side. I have a project in mind for the excess Kaffe Fassett Ikat Streak cherry red fabric that's on the back. Of course, all I want to do is work on it - this and the new red project, but there are several constraints keeping me from both. Grumblemumble.....


As the bulk of my work has been turned in, I am suffering from a major case of procrastination and writer's block. So I'm writing, and hoping that somehow, this will get things unblocked. Forgive me if you feel the need to whip out a thesaurus; I do have to write for a graduate class... there's a word I'm looking for... it's not vernacular or dichotomy... discourse! The paper is about language. Thus I am assembling the adult, academic vocabulary for this discourse. Ahem.

We put lights up outside the house a few days ago. No robotic reindeer, no chase or icicle lights hung from the dormers. Simple white lights, carefully entwined around the lamp posts, and the trunk of a bush of unknown species growing on the edge of my patio. It is now amusing to watch the birds and squirrels attempt to interpret the addition of the these things to the bush where the feeder is located. While I have best wishes for the birds, I was rather hoping the squirrel would electrocute itself when it began gnawing on that one bulb a few seconds ago... the bush is lovely in the dark, if a bit overly luminescent. There is neither a timer or a light sensor on the plug or the lights, and even with the blinds down, covering the window in my room, the glow from the this bush pervades the darkness of the apartment.

My two foot faux tree is upright, lit and decorated. The advent wreath, devoid of purple and pink candles this year for lack of time (I think God will forgive me), replaced by white and a red candles, is also up.

Later. Much, much later...

I did mostly unblock my writer's block; however, it's taken ten hours to do so, coupled with a three hour run down to the public library to cram in some last minute research, and the remembrance that I still have half the project to wrap up tomorrow, along with a three and an half hour mathematics final, and a separate three page mathematics assignment, both due by 11pm tomorrow. I have recollections of feeling this way at the end of summer term, the most notable differences being that I am not dehydrated and suffering from a week long migraine.

Discretion may be the better part of valour at this hour; I'll work on the mathematics tomorrow morning when I am fresh rather than try to ponder theory after having wrung out my brain.

Wednesday, October 24, 2012

swatch-tastic

Back in 2007 I took a trip to England with a 36 or so hour stopover in Paris, and for whatever reason, I started picking up these goofy patches. They were only a pound or so, and it was a few days into the trip that I began looking for them, so I missed looking for Stonehenge and a few other places... I've forgotten the where. Wells Cathedral probably didn't have one anyway, but there's one for Glastonbury Abbey, Stratford upon Avon, Canterbury Cathedral, Brighton, Oxford, Salisbury Cathedral and Cheddar Gorge, London and Paris as well, and the plan was find a sweatshirt that said ENGLAND or with the cross of St. George and put all the patches on the back. Which obviously never happened.


Oh, Fransson! had a quilt of the Tokyo Subway that was finished in 2011 which made me think, a London version would be way more fun for me personally since I've actually been there and I could put all those silly patches on it as embellishments. I have seen other travel quilts done in the style of a sampler that feature novelty fabrics and incorporate tee-shirts from the trip - the only tee-shirts I bought on the trip were at Oxford college, one for myself and my brother, who collects collegiate tee-shirts, for the wicked low price of 5 pounds each. And one at the Louvre, of the Venus De Milo; the image and Louvre logo began to peel off after the first washing, clearly it was not a screen print, and will never be used in a tee-shirt quilt. Neither will the Oxford shirt; I love it way too much. The London Tube Fabric I picked up from the 3 Rivers Quilt Show this past spring, with the intention of at least using it was as part of a label for a quilt - at least a throw - commemorating this voyage. 


And now, here I am, 5 years after the trip, at a quilt shop that had 3 very different stereotypical Anglophile fabrics. Total impulse buy. 


 And no idea, or plans what to do with it. I have a feeling it's going to be more modern, incorporate something of a map; two things I've never embarked upon before. I have fabric maps of the London Underground and Aboveground...which would make fabulous placemats. Or something. Reversible.

Sunday, October 21, 2012

swatches for the next project and other things

They are very William Morris-y; at least, the two on the ends are. Mom grabbed the one second from the left, I'm not sure how I feel about it, but I've got some time to let it grow on me before I start anything. We purchased them from Bev's Country Stitchin' in Cambridge Springs, PA - this was totally mom's idea, so maybe this needs to be for her... they're so her colors.  These were designed by Jason Yenter; the two in the middle are from the Avalon collection, by In The Beginning Fabrics. I cannot find any information about the other two, only that they were with the other Jason Yenter fabrics at the shop, so I'm assuming they're his.


Not so sure about these kids though. I like them the best, though.
The one on the top left reminds me of a Vera Bradley. 


Mr. Bruce. Cuddle-bug
And since the cat wasn't available, we went with the next best thing.