Showing posts with label art with kids. Show all posts
Showing posts with label art with kids. Show all posts
Wednesday, July 31, 2013
the class quilt: first cut
this has only taken all summer, but there were things like cousins having babies and quilts that family members had asked for to be done... I did say that I wouldn't post the final picture of this until the students and Miss Honey had gotten a chance to see it in person, but here's a production teaser, which doesn't give away anything of my master plan. It's almost August people. School starts in like, 17 days [when you say it like that, it's almost frightening]

Tuesday, July 9, 2013
koinobori - fish kites
 Lakes, rivers and streams, oh my. We pretended that the rug was a boat while we read the story [some of the boys fell overboard - that's what you get for a 3:11 girls/boy class] and we made fish kites. The kids were enthusiastic participants during the story, being cold and wet - and being thrown overboard and rescuing their friends. Perks of a smaller class size, having the space to get everyone on an 8' x 10' rug and pretend it's a boat, and guide them through imagery.
The fish kites that we made were based off of this lesson from the Smithsonian institution. For our purposes, we weren't getting into the history of Japanese internment [way over their heads], but that's a lesson I'll be keeping in my back pocket for the future. The koinobori were a project that were INCREDIBLY easy to adapt for the 3 and 4's. We talked about how kites that they are familiar with are were similar and different to this type of kite. We talked about fish and what fish need to survive. We could very easily have talked about symmetry.
The project calls for glue - we stapled the sides together on the longest, straightest side - three to four did the trick and kept a tube shape without us needing to worry about drying time - we only see some of the kids for three and a half hours and by the time we get to the activity, we're down to an hour and a half, two hours. Glue doesn't dry that fast. We also used construction paper. While the children were coloring their fish,
I read another book, "The Rainbow Fish". It gave the children another point, however inaccurate, or reference about fish and what sorts of things fish have. It made me wish I had a real koinobori to bring in - I have child size yukatas. I'll just have to visit Japan.

Regrets -
I didn't think of having fin templates. Some of the children were very concerned about having something "exactly right", and I do a lot of "Eh, it'll be fine, do your best." While I realize that for this project this is a minimal concern, for other projects and tutorials that I attempt in the future, I will need to be aware of having templates and clearer guidelines.Also, I went home to my parent's house over the holiday weekend - they have an overgrown patch of bamboo in their yard. While I'm not 100% certain that bamboo grows in Japan, or that it would have been accurate for display, I do know that bamboo is used as fishing rods, and that the kids would have loved having a rod for their fish rather than just string to carry it from. I wish I would have gathered some small bamboo rods.
Wednesday, July 3, 2013
Crayon Madness
We made crayons today using my handy toaster oven, some silicon molds and broken crayons. I had to peel the paper off the crayons ahead of time myself, and got the molds from my friendly neighborhood Swedish home supply store [they have flowers, fish and stars]
 it took some jiggering to get the stars out of the mold without the stars breaking, and the crayons had to go through the melting process a few times - 200 F degrees for 7 minutes seemed to do the trick for getting the crayon to melt all the way.

We had the kids pick out the colors they wanted and filled the trays. The toaster oven was in another room with a fan running and the windows open - when melting the wax smells a bit like a hot glue gun. I also discovered that it was best not to mix materials - soy and paraffin waxes don't seem to like each other. The kids, however, were ecstatic with the end results.


 it took some jiggering to get the stars out of the mold without the stars breaking, and the crayons had to go through the melting process a few times - 200 F degrees for 7 minutes seemed to do the trick for getting the crayon to melt all the way.
We had the kids pick out the colors they wanted and filled the trays. The toaster oven was in another room with a fan running and the windows open - when melting the wax smells a bit like a hot glue gun. I also discovered that it was best not to mix materials - soy and paraffin waxes don't seem to like each other. The kids, however, were ecstatic with the end results.


Thursday, June 27, 2013
superhero armbands

Since I've been a chronic constant poster and seem to have dropped off the face of the earth, yes I'm still alive. 15 weeks with 6-7 year olds was not enough to bulk up my immune system; two weeks into the summer and I'm not sure what I contracted but I know where it came from. Moral of the story: wash your hands, wash your hands, wash your hands... which may not have been enough. My class helper is down for the count with something else.
 Yesterday we made quick-and-dirty bracelets with gross grain ribbon and iron-on Velcro tabs - I didn't know this beast existed, but it made my life pretty fabulous. 12 pre-cut semi-sticky so they stay kinda put where you put them hook-and-loop tabs in a box, 90 seconds with a hot steamy iron and you're done. Ka-pow. It was something like $3.50-$4 for the box, but since we're only there for a few hours and glue takes forever to dry, being able to press an iron down for a few seconds and then hand the project over to a child was pretty rewarding for me. Also rewarding was watching them play superhero afterwards. Or superhero ballerina. Whichever.

Action shots... my one and only girl for the day, for whose bracelet we made special arrangements to stitch beads on, and another friend, fixing a hinge with a thermometer and a pair of tweezers.
 The project originally called for velvet ribbon, whereupon you took rubber stamps and embossed the velvet with the stamp image using the iron - something about laying the ribbon with the velvet fibers facing down on the rubber stamp and holding the iron on it for so many seconds... Right... Because I have a million tiny rubber stamps laying around. When was the last time you saw velvet ribbon or a rubber stamp the size of a nickel or dime? It sounds very cool, in theory! I checked around the Metro area at three different craft stores and could find neither velvet ribbon or rubber stamps. Granted, I didn't check at a specialty place in the Strip for the ribbon, but at that point in the hunt, without the stamps, there was no point in having the ribbon.
 Also, when you have a class with a ratio of 4:1 boys to girls, sometimes 13 or 14:1, bracelets sometimes have to get spun as superhero armbands. But they had fun making them anyway. There were stickers involved. Lots of stickers. We had the usual hitches that made this less than ideal - not having a completely accurate head count until the minute we did the project means there's only so much prep I can do ahead of time. In this case it meant just having everything assembled, because I knew if I had made the bracelets ahead of time for them to decorate, there would have been an extra child going without.
When preparing the ribbon, I measured the length of the ribbon needed on one of the children's arms, then cut it about an inch longer. When it was time to iron, I folded about half an inch of the ends of the ribbon under the Velcro square so that the bracelets had a nice finished look. The width of the tabs was the same as the ribbon, so folding over the end and tucking it under the tab when ironing took care of any fraying ribbon. I also tried to put the loopy part of the Velcro [the softer bit, not the hook part] on the part of the bracelet that would fold over and lay facing down on their skin, because the hooks would be very irritating, especially on baby skin [it would bother me]. How do you figure this out? if you have the bracelet facing you with the decorated part facing up, the hooked, scratchy tab would be the one you put on the top with the decorations. The softer loopy tab would go on the underside - you wouldn't be looking at it.
Tuesday, June 11, 2013
ba ba black sheep
Last week kicked off pre-school's summer program. A friend of mine was a little surprised to find out that pre-school ran for the summer. As the parent of four kids under 7, I asked if their preschool ran a summer program; he said no, but now he was rather wishing it did, because neither he nor his wife have summers off, and they are scrambling for childcare. Let me clarify that while it is structured time similar to the regular preschool day, there is significantly less instructional time.
 This week, the lesson focused on farming. We have a community garden on site, but it rained all day, so I couldn't take the kids out to have a look at what a garden looks like, not that there's much to look at right now. So we drew pictures of what we'd like to grow if we had gardens. And we made sheep. They require a bit of prep work - unless you feel like buying black poster board, but chances are you've got a cardboard box laying around.

I cut out a sheep-y looking shape from cardboard that the clothespins seemed to match size wise. Using black acrylic paint, I pre-painted the sheep faces - again, if I wanted to go wild, the sheep could have had legs that were all over the rainbow, but that might have ended up with a preschool riot over who got what color. Know your audience. And your personal time constraints and level of concern. If I do this again with a group this big, I'm not painting those legs. Smaller group, I'll reconsider.
For the yarn, I pulled from my stash Lion Brand Homespun in a bunch of random colors that I don't know the names of [one of them is obviously green though : ) ]. It's acrylic, so there were no concerns about allergic reactions, and it's got a great natural, wooly sort of look. Also, it's slightly variegated, so the colors change just a bit, depending on what color you've got.
 I made a test sheep to figure out how much yarn I needed; 4 lengths of yarn from the skein with my arms stretched out straight, plus a little extra seemed to be enough for an older child/adult, but 5 or 6 would have been better for the preschool set unless we were sitting right there helping them pull it taut. Winding the cut length of yarn into a ball should go without saying, as, with a large group of children, should just handing them a ball of yarn without giving them a choice of color. They were total troopers : )

Above is the test sheep ...
To get this started, clip the clothespins to the cardboard, and use the clothespins to hold down one end of the yarn. Now, start wrapping yarn around the cardboard! When you get to the end of the yarn, tuck it in somewhere! Ta da, you've got a sheep!
We do two activities a day. Most of my kiddos are going to be gearing up for preschool in the fall, but some of them are entering kindergarten. Last week, I had a full class of 18 kids. The children made a mobile collage about themselves and hearts. I didn't have a full roster until I got to school, so for the 4-5 set, the mobile wasn't the best plan without more set up; it would have worked if there were less kids.There were half as many children in the afternoon; we tackled the hearts then, and I made the project as simple as I could, since we had an hour to complete it. I'm not sure how, but this one was left behind. We used wax paper, tissue paper precut into one inch wide strips and glue sticks. I pre cut the wax paper into squares, and we had the children put the glue down on the wax paper, then lay the strips down. After they were done, the adults in the room cut out the hearts.
 This week, the lesson focused on farming. We have a community garden on site, but it rained all day, so I couldn't take the kids out to have a look at what a garden looks like, not that there's much to look at right now. So we drew pictures of what we'd like to grow if we had gardens. And we made sheep. They require a bit of prep work - unless you feel like buying black poster board, but chances are you've got a cardboard box laying around.
All you need is yarn, springy clothes-pins, cardboard, and a bit of paint! If you feel like going crazy, you can paint the clothespins by dipping them into water thinned paint, but if you're pressed for time, they'll still come out super cute with plain colored legs.
I cut out a sheep-y looking shape from cardboard that the clothespins seemed to match size wise. Using black acrylic paint, I pre-painted the sheep faces - again, if I wanted to go wild, the sheep could have had legs that were all over the rainbow, but that might have ended up with a preschool riot over who got what color. Know your audience. And your personal time constraints and level of concern. If I do this again with a group this big, I'm not painting those legs. Smaller group, I'll reconsider.
For the yarn, I pulled from my stash Lion Brand Homespun in a bunch of random colors that I don't know the names of [one of them is obviously green though : ) ]. It's acrylic, so there were no concerns about allergic reactions, and it's got a great natural, wooly sort of look. Also, it's slightly variegated, so the colors change just a bit, depending on what color you've got.
 I made a test sheep to figure out how much yarn I needed; 4 lengths of yarn from the skein with my arms stretched out straight, plus a little extra seemed to be enough for an older child/adult, but 5 or 6 would have been better for the preschool set unless we were sitting right there helping them pull it taut. Winding the cut length of yarn into a ball should go without saying, as, with a large group of children, should just handing them a ball of yarn without giving them a choice of color. They were total troopers : )
Above is the test sheep ...
To get this started, clip the clothespins to the cardboard, and use the clothespins to hold down one end of the yarn. Now, start wrapping yarn around the cardboard! When you get to the end of the yarn, tuck it in somewhere! Ta da, you've got a sheep!
I probably could have brought along black felt or foam or something and cut little tabs for ears and glued them on, but I had already reached my limit on this project. It also looks enough like a sheep that we all know that's what it is, and the kids were super enthusiastic and wanted to play with them immediately. I will note that by painting the legs brown, I was able to use one of those black Sharpie super fine pens to write the children's names on one of the legs; aesthetically, we can still see the child's name but it's not jumping out across the room at us. The sheep were a huge hit.
Thursday, May 23, 2013
the little class quilt that could, part 3 [I think]
my graphic designer friend and I were wandering around Lawrenceville a few weekends ago and we found this place that prints children's art work on clothing. I asked them what it would take to swing printing for a quilt and whyfor, and they said it wouldn't be a problem, but the images would need to be formatted. My GD friend edited the images into PDF format so that they could be printed out two by two. I'm very excited about this since I had been struggling with the initial format bleeding colors, trying to scan and print the images and then my printer deciding not to work - you can read about the initial entry here , the quilt fail here, and what I tried to do to solve the problem in the first place [unsuccessfully] here. I told them when school was out, and that I wanted the project done before then. They say that this should all be done and dusted before school is out.
Why am I holding my breath? Have you met me? Given how long it has taken for several other very important things to occur or for me to secure in the last few weeks, I'm waiting to hear that something has happened and that the process has stalled and they're very sorry but... I'm not trying to be pessimistic, but I'm also trying not to get my hopes up. It has been one thing after another around here, and I could use some good news.
Just got an email - the person I talked to about this is out of town until next week, so I'm not seeing any action on this until she gets back, because she's the one I talked to and knows the most about it [reasonable enough]. Sometime next week. Which means my students will likely not see the finished product while they're all still together as a class. Because I'm missing the most important element of this project. Headdesk. Live and learn. I may do this again, if I ever have my own class. But I will start in September. Or by then I'll have the bugs worked out of the process. It's all about learning, right? From your mistakes, right? [And making no promises.]
Here's a bit of good news - I finally [FINALLY!] got my did-everything-I-needed-to-do letter thanks to the guy at the graduate student affairs office who I swear has magical powers. And kapow, I am subbing tomorrow in a 3rd grade classroom. Not my kids, not even the district I was in when I student taught, but 3rd grade, which was actually what I had been hoping to student teach in initially - and then I found out where and what my placement was all about and my first thought was, great, 1st grade, again - and I have to drive where? Huh? [And shh, don't tell anyone, it was the best thing ever!] But no, seriously.
Friday, May 10, 2013
the perils of printing
okay... so I've learned a lot about printing from Crayola images. And a lot about my printer. By all accounts according to industry standards, it should not still be working or communicating with any computer currently on the market. Also, Crayola colors are hard to reproduce off a printer, and just because you have an image that is 6 inches square does not mean that you will be able to get it to print off 6 inches square. It may be bigger, or smaller, than the original size, if you are working with scanned art. And good luck if you are trying to conserve paper; that requires fiddling with bitmaps in the paint application on Windows - this is if you are working with the most basic of software. I'm not a graphic designer, so if you are a GD, I'd appreciate free software suggestions or any other digital advice. For those of you doing this by the seat of your pants like me, do not lose heart: It. Can. Be. Done.
I did, finally in all the monkeying, figure out how to get the printer to just plain work - it involved paying attention to the printer status and a lot of restarting the computer at inopportune times. AND I have a whole bunch of test batch fabric squares in a moment-of-truth test wash. One of the squares did finally reproduce true-to-color - yes there are printer lines, but it's true to color, and if this works Bubble Jet set stuff works, and the colors don't bleed or wash out it will be color fast, which is what I want. It's not in the test batch wash. I'm going to hold off and see what happens.
So if everything washes, the next challenge is getting the rest of the squares to produce true to color. I have a new ink cartridge [super helpful] but one printer setting does not fit all images. Some of the images are done with more reds and oranges, and some are more green and blue, and telling the printer to print off the blue-and-green pictures on the red-and-orange setting doesn't quite work.
Sadly, some of the test images would have been just fine if I hadn't run them through the printer a second time. Live and learn. Stay tuned for a how to prepare fabric for printing tutorial, because that's coming up. Hopefully your printer is newer than mine and talks to your computer.
And now, for the Moment-of-Truth
Thursday, April 18, 2013
the little school quilt that could.
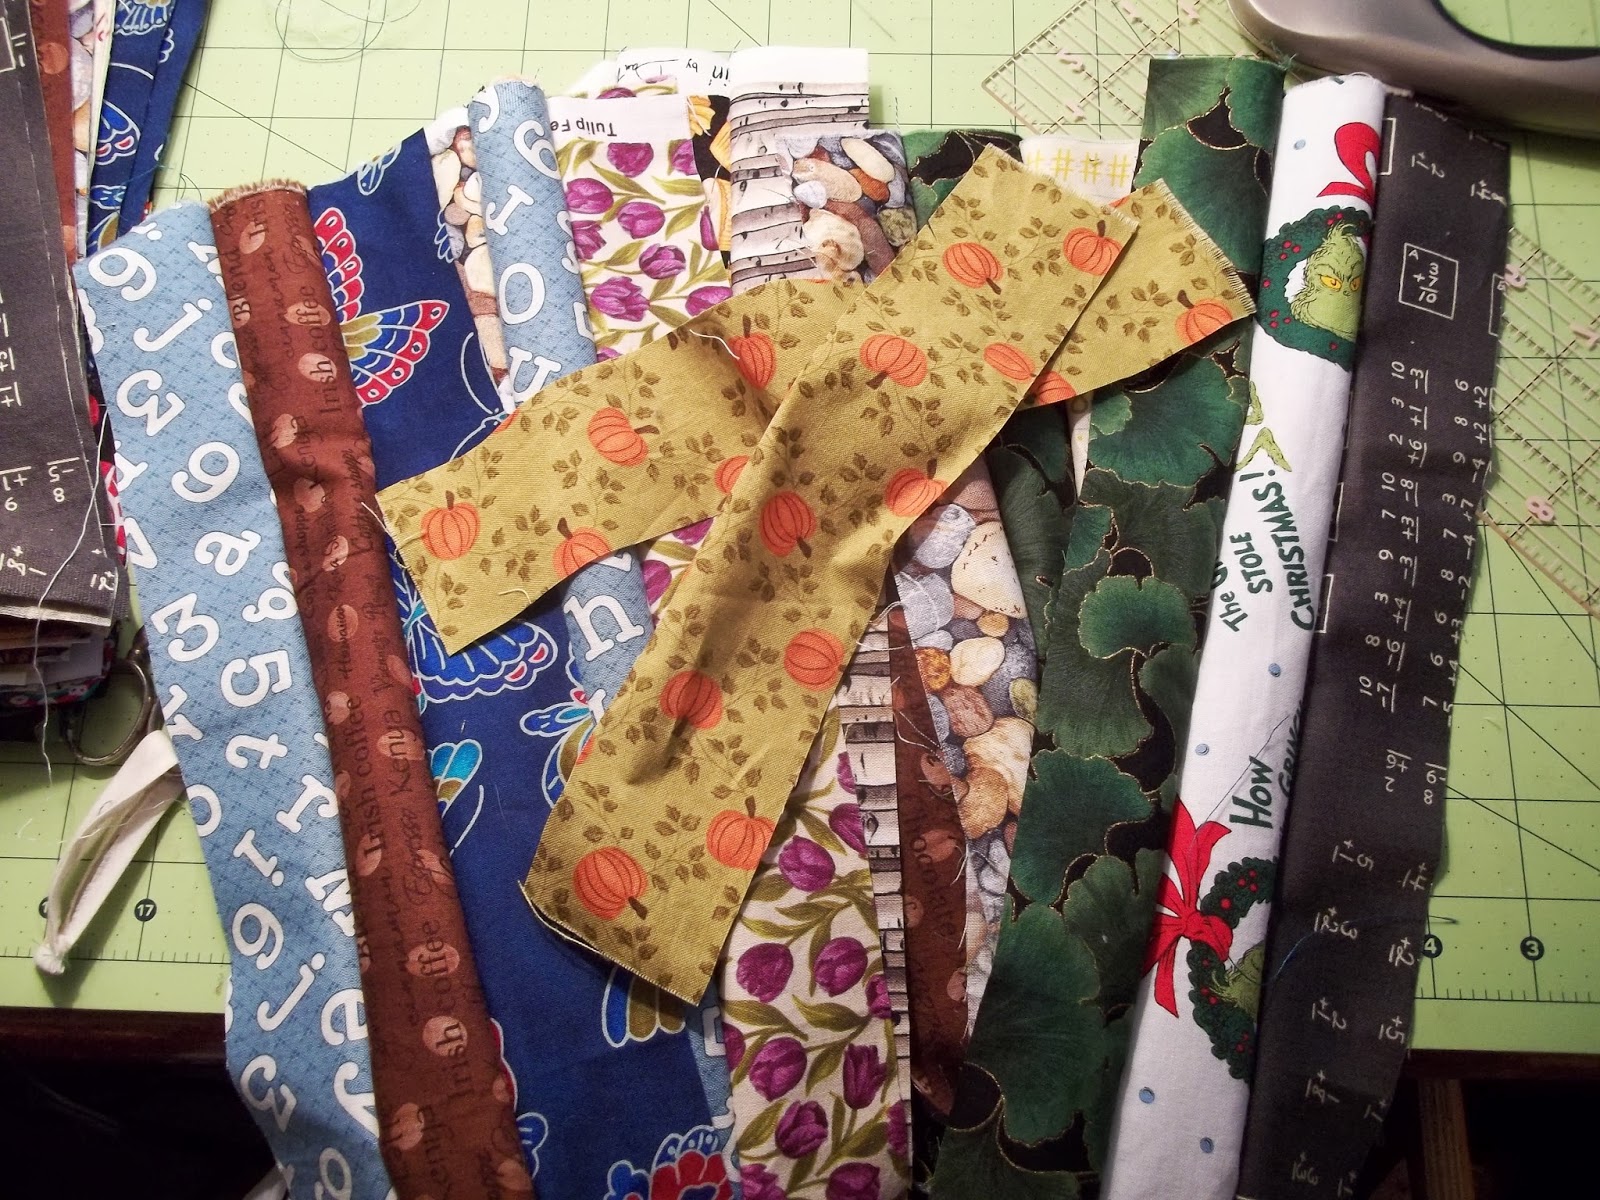
This is what I was doing while the fabric squares weren't color setting - hunting down fabric for the class quilt. Not the best idea to start out at 4 in the afternoon, but I've lost my sense of time and didn't realize how late it had gotten - I should know better, I used to live out that way. The big box fabric store didn't have anything I was really looking for, but there's also a quilt shop in the North Hills that is very accommodating and has a great selection of fabrics. As requested by Miss Honey and in keeping with the theme of "favorite memory from school", I tried finding fabrics that had something to do with school or things we studied. I'm usually not one for kitsch, but some of the things I found aren't that bad.
 |
| telling time, trees, a map for cardinal directions, butterflies |
 |
| Seuss, Grammar, plants, math, coffee, cupcakes |

[the colors are off but] south western fabric similar to the wool blankets we read about and I had example of that the Dine [Navajo] make. Owls, which were featured on bulletin boards in the room and on the door. And a [February] calendar for learning to read calendars. Also because, even though this calendar was from 2008 and is a leap year, all the days happen in the right places, which means this is what our February looked like. I'll just put something over the 29.
What do cupcakes and coffee have to do with anything? The cupcakes were a no brainer; I made cupcakes at least twice and then Miss Honey surprised me with them on my last day. I saw the beans on the fabric and couldn't resist. I love coffee. I got to school and found out Miss Honey loves coffee. I loved that there was a coffee maker at school, and I could throw everything in there, walk away and poof, there would be hot coffee, unlike a French press, which requires constant attention. I can't remember what day I started making coffee, but she loved that I got to school before her and there was a hot, fresh pot brewed when she arrived - "You do all this [teach] AND you make coffee?!" I loved that she had creamer in the fridge and was kind enough to share. By the end of my tenure, the First Grade cohort also had Celebrate Friday with Starbucks because I easily passed one on my way to school. Sensing a theme? No coffee, no school; it's a truth universally acknowledged. That a Kurig was purchased as a gift for the teacher's lounge for Christmas I feel rather confirms this.
all that's left now is to decide with what color I'm going to tie it all together. [and the back, but that can come later.]
quilt-fail
how did I go wrong.
no, more importantly, where did I go wrong.
I finally sat down today and ironed all 24 of the patches for the class quilt that my 1st graders started a few weeks ago. Then put them in the dryer. Followed the directions. Then did a spot test with an atomizer to double check that the colors had actually set and I could sit down and begin the grunt work of putting this together with the fabric that I bought while said patches were tumbling in the dryer. [4 PM - not a good time to head out of town. In any direction, really, but the closest fabric places are northward] I've ironed and tumbled twice now. Out of paranoia that it somehow didn't take. [Maybe because the day we did it wasn't standard procedure and I had a really bad feeling.]
And the colors are bleeding. Except for one that was accidently left under the iron so long that it began to burn. So obviously that one set properly in the burned place, but the rest of them? There will be 23 bleeders.
Epic, epic fail. The worst part is, I'm not sure what part of the process went wrong from when I did the test swatch - the colors on which will not budge - to when I went into the room and did it with the kids - I can pinpoint about ten different things that happened that day that might point to why this didn't work. I'm also finished with my placement, so there's no figuring out the kinks and doing it over.
 I've found two options that could potentially save this project - both would involve scanning the squares and printing on fabric with an inkjet printer, and I'm insanely skeptical about both. Mostly because I've never tried either. But then I never tried medium and crayola, and it's got a 50/50 success rate, so there you go. The plus about scanning would be that I could potentially digitally clean up any of the test spots where bleeding occurred, and then print. I'm emailing the Thursday Quilting Graces for their expertise. The kids worked too hard and this is too stinkin' cute to lose to hydrogens and oxygen.
Thursday, April 4, 2013
album quilts, kinder style
Inspiration strikes at the strangest and most inconvenient times. Like 7:30 PM, in the middle of a chorus concert.
"... I could could do thus and such with my 1st graders---" And focus on what you're supposed to be doing. Mind the iPod and the microphone, and all will be well. [The concert was great. The kids did a fabulous job, I was so proud of them.]
The summer dreamers made batik style glue resist tee shirts with white glue and tempera mixed with heat-set fabric medium on white 50/50 cotton/poly tee shirts. We had fabulous success letting the glue dry overnight, then having the kids paint on top of the dried glue, then tossing two classes worth of tee shirts [ 25 or so size child small to large] into a dryer on high heat for 70 minutes for the heat set, then washing on a regular wash cycle with detergent to get the glue out and drying again.
I don't want my current kids to do a glue resist project. We discovered in doing the glue resist that at 7, many of them had difficulty with the concept that they had already put down a design with the white glue, and they needed to just put paint down, or work with the design they had, not paint yet another, different picture. Maybe if we had added food coloring to the glue or something, I don't know, but it would have had to wash out to work on a white tee shirt.
What inspired me to tackle a quilt with my current students was this kindergarten teacher's kinder quilt project. A quilt for every year she's been teaching, or almost every year. I was going to have my students make a paper quilt, for a bulletin board, and then I found this website, and the wheels started turning. When I was born, my mother and aunts orchestrated a quilt for my paternal grandmother with squares done with drawings by each of the grand kids in crayon. Except I didn't draw mine, my mother did [it bears a striking resemblance to my teddy bear...]. Plain old wax crayons. We have plenty of those laying around.
The kinder quilts are done with markers. Magic markers. Kinder quilt doesn't say anything about the types of markers they used, they just took pictures. My thought was to leave this project, when completed, with Miss Honey [who I guess should get to pick out the fabric that goes with it...], but what happens if it needs to be washed, heaven help us all? I thought immediately of the heat set medium, except that I didn't want to break out tempra paints, because it's a tie-in to a social studies lesson on the past, and what makes our history, and we're talking about the memories [history] of 1st grade. and painting could go south fast, no to mention clean up. Draw a picture. On fabric. Easy peasy lemon squeasy. I figured the magic marker might be the way to go, since it might pull the fabric less when the kids were drawing as opposed to crayons, but came back to the wash problem. And the heat-set medium, which can't be added to a marker like it can to tempera paint. I'm not buying a set of heat set markers - they're almost as much for one as a box of 8 washables - also, I have 24 kids. Not realistic. And we're doing it all together.

So, necessity being the mother of invention: can you spray [with a spray bottle] a fabric square with undiluted heat set medium, let it dry a bit so the marker won't totally bleed, draw on it with marker, let dry, iron it for the prescribed amount of time, wash it according to bottle instructions, and have it come out looking fit and fabulous...? why am I sitting up past my bedtime chewing on my fingers for this?! probably because I'm bone tired and have my doubts about it working and really want it to work.
The results are in:

Yes. Yes you can. Can I get 24 kids to do it. That remains to be seen.
Saturday, March 16, 2013
Luck 'o the Irish
 A leprechaun came to class on Thursday and trashed the room...
 He left us a note on the board, saying that he lost a shoe in his merriment. He also left us a book... which was nice.
We found the shoe on top of the projector. I fetched it while Miss Honey provided photo-documentation.


The students wrote letters to the leprechaun, asking him questions and writing statements about what they thought of the room. The next day, there was a surprise waiting for us! [Miss Honey and I had Starbucks! ;) ]


We also had barely green homemade fun-fetti cupcakes.
A fine time was had by all.
Saturday, March 2, 2013
the ruckous in room 161, or More Read Across America

I was doing some serious nail biting there at the out come of this contest [again,
For the socks, I folded an 8 1/2 x 11 piece of paper in half and free-handed a sock on both sides of the fold. The students were instructed to write their name on the front of the sock first, and then decorate it with crayons. They were allowed to have 5 puff-balls, and one piece of sequins [someone did not follow the directions when I walked away from the table - they came in late, and really, what am I going to do at that point, take away recess? it was already glued down. Choose battles wisely.] I traced Fox on a clear transparency and blew it up onto a piece of red paper with an over head projector [remember those!] The grass was free hand cut. We kept the basket up with thumb tacks, and the clothes line was taped up with packing tape.
I really thought the door about teeth and flossing, with a box of floss [!] was going for the win with Thing 1 and Thing 2, and then there was a Truffla Tree door that looked like flossy cotton candy. Good old Fox for the win.
I got a little sad when the kids said, "Oooh! Miss O, next year, let's do 'Horton Hears a Who!' [I was dressed up as Horton for the day, sans trunk] Well, kids. Next year, you will be in second grade, and Miss O may be still looking for a job. But we didn't talk about that. We talked about Diffendoffer Day, and Star-bellied Sneetches, and cupcakes baked in ice cream cones, which are Miss Honey's favorite [and I think mine too - ZERO clean up! so easy to hold! SO MUCH FUN!!!]
Friday, February 15, 2013
monoprint hearts for your sweeties

Only trouble was that the paint dried very quickly and some of the students found themselves with a monoprint that was less than desirable - also, avoid words, like our friend in the top left. And a final word, for the sake of expediency, consider pre-picking the color of the paper and pre tracing the hearts. If there's time to kill, make them do it. If time will likely be an issue, mandatorily hand them a pretraced half shape and say "paint inside the lines". In this case, it doesn't stifle their creativity.
Saturday, December 15, 2012
stars in the window - a tutorial

Helpful, but not necessary, is a jig for forming the star. I used the side of an old drawer to drive some nails into to wrap the wire around, 3/8" plywood or thicker would likely do the trick if you've got a bit laying around. As long as it's thick enough that the nails are driven in about halfway; you do not want the nails pulling out as you are wrapping your wire around them. The piece of wood that I used measured 15" by 10" or so, and was heavy enough that I was able to manipulate the wire around the nails without the whole thing flopping around. If you are worried about such things, a C clamp or a Quick-grik clamp or something similar would help keep the jig anchored while you wrapped the wire with both hands, if you found it necessary.
materials
for the jig (optional)*piece of plywood or a board at least 3/8" thick, at least 10" square-ish.
qty [10] 1 1/2" finishing nail or smililar.
hammer
for the stars
16 gague galvanized steel wire, or another firm, non-rusting hobby wire. (I used OOK brand)
beading wire, ~ 20 gague, finer (a smaller number, like 18, or 16) to accomodate some seed beads.
assortment of beads and buttons in a variety of colors and sizes
needlenose pliers
wire cutters (a combo of the pliers/cutter is helpful, but not necessary)
a ruler
instructions - this star ended up being about 4", not counting the loop at the top [pictured above and below]
Start by creating a star form using either the jig*[using a jig? really, see this section] or make one free form. Have about 6" total of wire reserved for the end of the star, 4" of wire for the hook, and about 2" on the opposite end for the wrap. A curly-cue is a nice place to start for the hook of the star; if you really want to get fancy, you can branch out to things like G clefs later, after you've perfected your wire wrap technique. Bend the points of the star, until the other end of the wire is back at the beginning, and wrap the end around the middle of the stem below the hook. It's okay if the star's top isn't quite as pointy as the rest of it. Wrap the end once or twice around, and then trim the excess wire off with the wire cutters as close to the stem as you can.
now for the fun part! [if you are doing this project with a bunch of small children or impatient people, have the stars made ahead of time.
one you have your star form secure, take your beading wire and cut a a generous 24"; this gives you enough to wrap a small amount securely as a starting point, have enough to string your beads on, and enough to wrap off at the end. Take one end of the wire, wrap it around the top part of the star a few times to secure it in place, and start stringing beads. Or buttons. Wrap the wire around an arm of the star, and start stringing more beads, weave around other strands of beads, and keep going until you have about two inches of wire left near an arm of the star. Wrap the end off, tightly [you don't have to use all of it] and trim off any excess as closely to the edge of the star as you can. Viola! Done!

the jig
 why 10 nails and not 5? you need a nail for each of the points that the wire has to bend at, so not only the acute points the of the star, the pointy- points, but the obtuse angles, the interior parts where the star comes in at.
Remember, when using the jig to form the star, the wire goes on the INSIDE of the nails that aren't the points and around the OUTSIDE of the points.
If you're not comfortable free hand drawing a star, find a picture of a star you like on line, print it out, and use it as a guide for where to drive your nails for the jig. The good news is that it's paper, so when you're done hammering, you can rip the paper off, no harm, no foul. As you can see, I use the side of an old drawer as the base for my star jig; if I wanted to, I could make a second, smaller star jig on this board, and get a two-fer out of the deal.
Tuesday, August 9, 2011
tie it up tuesday
why tie-it-up-Tuesday? Because tomorrow is Wrap-it-up-Wednesday - last day of PPS Summer Dreamers!
Today was our gallery crawl. I'm not sure what exactly happened, but somehow we missed the whole walk-around and look at everyone's stuff memo. But we did. A few of my student's parents came, which was nice.
Here are a few of the ceramic things which came in at the VERY last minute:


I'd really like a lesson on how to arrange pictures on this blog in a more compact fashion that doesn't leave a few football field's worth of space between them, so if you have any pointers on that, I'd love to hear it.
Today was our gallery crawl. I'm not sure what exactly happened, but somehow we missed the whole walk-around and look at everyone's stuff memo. But we did. A few of my student's parents came, which was nice.
Here are a few of the ceramic things which came in at the VERY last minute:
 |
| Shaving cream + glaze! |


I'd really like a lesson on how to arrange pictures on this blog in a more compact fashion that doesn't leave a few football field's worth of space between them, so if you have any pointers on that, I'd love to hear it.
Monday, August 8, 2011
make-it-monday glue batik tee-shirt tutorial
In the continuing list of art project to do with elementary students (or anyone crafty who would get a kick out of it), I bring...
Elmer's glue Batik!
Hooray!
WARNING!! *this project requires two separate drying times, plus the additional use of either a dryer for a full cycle or an iron if using Tempra paint and the fabric painting medium*
Materials
a white tee shirt in the painter's size
acrylic paint in cyan, magenta and yellow (these colors mix beautifully for secondary shades of greens and purples)
OR
tempra paint in cyan, magenta and yellow AND
fabric painting medium
thin foamcore or an empty cereal box
pencil
black permanent marker
optional equipment... or use all of them for some really neat effects
paint brushes
spray bottle
sponge
plastic grocery bag
Method
if you're not quite pressed for time...have the participant draw out a design on a piece of paper board or thin foam core - the paper board could be the back of a cereal box, what ever is handy. Remember, simple and big is usually best - intricate designs will be harder to accomplish with white Elmer's glue and will take more time.
Once the final design is settled on, go over the pencil lines with the black permanent marker.
Slide the paperboard design side up in between the front and back of shirt, making sure the tag is facing you if the front is what you want to paint. Center as needed.
Have the participant go over the design - visible through the front of the tee shirt - with the white glue. It will soak in and spread, so try to drag blobs of glue along with the tip of the glue applicator to achieve lines and filled in places.
if you are pressed for time... go nuts a la Jackson Pollak with the white glue. Or try for an Australian aboriginal design of concentric dot circles and swirls. Or just be creative.
set the tee shirt aside with the paperboard still inserted inside for the glue to dry. This takes a few hours. After the glue is dry, haul out the paint! This is where the plastic grocery bag comes in - if your paper inside the shirt isn't large enough to fill the inside, a plastic bag will fill enough of the shirt cavity that the paint design will not bleed through the back of the shirt. Acrylic won't need to be mixed, but the Termpra will need to be mixed with the medium as per the directions on the bottle.
 Paint can be applied with brushed, sprayed on with a spray bottle, pounced on with sponges, flicked on with a toothbrush, what ever.While painting, make sure any area that was decorated with glue is covered over and/or around with paint - otherwise the design won't be visible. Experiment with wetting the fabric slightly with clean water and painting with a dampened paint brush (with paint on it, of course) this will make the colors blend together. A dry tee shirt and a 'dry' (a not dampened brush with paint on it) will create a different look.
When finished painting, set the shirt aside with the bag/paperboard still inside. This takes a few hours, and is especially dependent on how much paint made it onto the shirt, how thick the paint is, etc.
Once the shirt is completely dry, remove the plastic bag/paper board. For acrylic paint, run through the wash - this will dissolve the white glue and cause the design to appear white.
For the tempra/medium method, follow the directions to set the paint. Our medium required that we either iron the shirt (putting a piece of clean, blank paper between the shirt and the iron)for five to ten minutes on high heat, or running the shirt through the dryer for a minimum of 40 minutes on high heat. Only after these steps are the shirts safe to toss in the wash to dissolve the glue.
I completed the glue and paint aspect of the project in the space of nine hours - this was setting up, applying the glue, the time I spent in a meeting after work and driving home with glued shirt in the back seat of my car, cooking dinner, walking around the block, playing with the cat, etc., eating dinner and then a chunk of epic paint time in the evening. In short, I could have been more efficient, and gotten it done a leeeettle faster. I did let the paint dry over night, then threw my tee in the dryer while I made breakfast and coffee and checked my email and showered, etc., the following morning. I was rushed, so I soaked it in a bucket of warm water and dish soap, and scrubbed at the glue spots with my fingers to encourage them to peel off faster.
Elmer's glue Batik!
Hooray!
WARNING!! *this project requires two separate drying times, plus the additional use of either a dryer for a full cycle or an iron if using Tempra paint and the fabric painting medium*
Materials
a white tee shirt in the painter's size
acrylic paint in cyan, magenta and yellow (these colors mix beautifully for secondary shades of greens and purples)
OR
tempra paint in cyan, magenta and yellow AND
fabric painting medium
thin foamcore or an empty cereal box
pencil
black permanent marker
optional equipment... or use all of them for some really neat effects
paint brushes
spray bottle
sponge
plastic grocery bag
 |
| medium-and-tempra premixed in squirt bottles (i didn't use this much, not even 1/4 of the bottle) |
Method
if you're not quite pressed for time...have the participant draw out a design on a piece of paper board or thin foam core - the paper board could be the back of a cereal box, what ever is handy. Remember, simple and big is usually best - intricate designs will be harder to accomplish with white Elmer's glue and will take more time.
Once the final design is settled on, go over the pencil lines with the black permanent marker.
Slide the paperboard design side up in between the front and back of shirt, making sure the tag is facing you if the front is what you want to paint. Center as needed.
 |
| tee shirt design (far too complicated) with the dried, applied glue and bag-stuffed tee shirt |
if you are pressed for time... go nuts a la Jackson Pollak with the white glue. Or try for an Australian aboriginal design of concentric dot circles and swirls. Or just be creative.
set the tee shirt aside with the paperboard still inserted inside for the glue to dry. This takes a few hours. After the glue is dry, haul out the paint! This is where the plastic grocery bag comes in - if your paper inside the shirt isn't large enough to fill the inside, a plastic bag will fill enough of the shirt cavity that the paint design will not bleed through the back of the shirt. Acrylic won't need to be mixed, but the Termpra will need to be mixed with the medium as per the directions on the bottle.

When finished painting, set the shirt aside with the bag/paperboard still inside. This takes a few hours, and is especially dependent on how much paint made it onto the shirt, how thick the paint is, etc.
Once the shirt is completely dry, remove the plastic bag/paper board. For acrylic paint, run through the wash - this will dissolve the white glue and cause the design to appear white.
For the tempra/medium method, follow the directions to set the paint. Our medium required that we either iron the shirt (putting a piece of clean, blank paper between the shirt and the iron)for five to ten minutes on high heat, or running the shirt through the dryer for a minimum of 40 minutes on high heat. Only after these steps are the shirts safe to toss in the wash to dissolve the glue.
 |
| ...teh kitteh comes in for a closer look |
Saturday, July 30, 2011
fun with still life
 And we're back. Sort of. At a loss one morning as what to do with the chilluns, I remembered still lifes, and how easy they are to set up with anything. And I needed some eggplant anyway.


Some of them really got the concept of drawing what they saw, some of them had to be led to water, others... others had major melt downs. But then, that happens everyday. Carry on.
Friday, July 29, 2011
Make-it Monday
Another week of Summer Dreamers drew to a close earlier today - I'm quietly cheering, having stood on concrete block floor four hours straight. Attendance was down today, way down, and several of my more... delightful students were among the missing, making class run a whole lot smoother. We were finishing up our papier machet project, which was going to be a pinata for the chilluns to take home, fill with candy and club to death. Then self said "Be realistic - none of these parents are going to do that for their child." I don't think I'd be terribly excited as a mom if my kid showed up with a pinata from school. Of course, I would be the mom who'd make it with my kids, but that's another story.
So we're making hot air balloons instead! It took me 20 minutes to explain this concept - I'd say:
"We're making hot air balloons with a plastic bottle bottom for the basket, and the papier machet form as the balloon!"
"What's a hot air balloon?"
"It's a vehicle for transportation - a bag made of silk or nylon with a heat source to keep the air in the balloon warm - because hot air rises - with a basket attached for people to ride in."
"How's it work?"
"The heat source makes the air hot in the bag and it rises - no hot air, no rise-y. We're just going to make a model of a hot air balloon - these won't actually work."
"Miss Zara, Miss Zara!"
"Yes?"
"What are we making today?"
*headdesk*
I don't have any pictures from today due to the flour + water + salt = mess all over Miss Zara's hands and clothes and apron. The process is pretty simple though. Blow up a party balloon, start applying strips of newspaper dampened in papier machet solution in an organized manner, making sure the strips overlap each other slightly. More layers = stronger side walls. Allow to dry over night. Decorate in what ever manner you see fit. Since we had problems with children and paint, the coordinator and I decided to get tissue paper and let the kids glue it on the sides instead [yay, modge podge!]. I need to rustle up some pictures of hot air balloons, knowing none of them have likely seen one, especially any that are food related. This is Captain Cook's Clay Kitchen after all.
*These pictures were taken after the event in question


 |
| On display at the gallery crawl, we cut off the bottom of plastic bottles and punched holes in them for the baskets |
Thursday, July 21, 2011
It's been one of those weeks. Yesterday I discovered my car was broken into, today I locked myself out of the house with out my phone... ugh. I'm trying to come up with something to do with 20 antsy first grade students and I'm at a total loss, despite hours of combing through the internet for ideas. Speaking of antsy, here's something we did last week:


It's the end of a nylon sock filled with sawdust and grass seed. My ninja cyclops monster. The googly eyes came in the kit - yes, kit - and the mask is Sharpie'd on. I'm not exactly at whit's end with these kids, it's more that the projects we were assigned to do don't take the full time period to complete, so you have to come up with something else that won't deplete the small amount of supplies on hand meant for other projects and to top it off, despite our requests to be put in class rooms WITHOUT carpeting... yeah. And the only paint we have is acrylic. Some got spilled on a carpet last week and the janitorial staff flipped out. So no more paint projects, unless we take the kids outside - almost hottest summer on record! - and we can't finish all the kiln fired glazing projects because we're already backlogged. Well, I have to fold laundry, yay! Stay cool out there, love from the Hobbit Hole.
Subscribe to:
Posts (Atom)