Thursday, December 26, 2019

Project of the year, 2020

Well, howdy. Its been a while.

I've been pursuing master's degree #2 which hasn't left a lot of time - or let's face it, interest - for writing outside of the academic. But it's winter break now, and I've caught a moment to breathe.

I've been hearing rumblings about the new Pantone color, the latest this, new year's resolutions et cetera, and it made me reflect on the projects I have in progress and the ones I completed.

I actually finished a Dr. #4 scarf! And I gifted it! I have a picture of it done; I'll post it eventually.

I also finished a pair of mittens and a hat which were also gifted. And I knit myself a new hat and cowl set, and a hat to match another cowl. [None of which I have pictures of, of course.]

A little extra space was found to set up the sewing machine, and while I really wanted to start something new [don't we all?] I took a look back and began digging things out that were partially completed. I finished the top of an I Spy throw, and in the process, I ended up donating a 30-gallon trash bag worth of fabric to a charity that makes small lap and lovey blankets for nursing home patients and children in crisis. I could have easily given more; I may yet. I felt such relief in letting it go and knowing that it would be put to use instead of being mouse eaten, dry rotting or molding in storage until I got to it. In this mess of donated fabric, I found a partially completed quilt that had been given to me to finish, one that I knew I never would. It had been given to me by someone parting with their mother's fabric stash. I have already come to a standstill where it comes to buying more fabric to stash. I'm working on not buying any more yarn unless it's to finish a project, which is a hardship given that there's this new, scrummy local yarn shop with fabulous fibers.

All this got me thinking:
Do I really want a legacy of half-finished projects?

That said, my goals for 2020 are to finish some projects that I already have started:

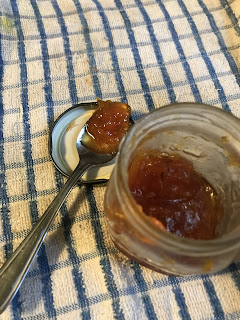
  1. Finish hand quilting a utility quilt - confession. I'm not even sure which project I was referring to. Maybe the orange marmalade one? 
  2. Bind two matching green quilts - I know exactly where these are. Under a bunch of mask making supplies. 
  3. Finish a green 18th-century jacket   Done and done! :D
  4. Finish the 18th-century linen gown   Its done! I finished it for a weekend event 10/24/ 2020!
  5. Finish the 18th-century worsted wool gown - So. Stinkin'. Close. (I'm not sure when the last update of this was, but now as of 10/30, it's even closer to being done than it was when I last updated this)
  6. Find the missing Row By Row from 5 or 6 years ago [whenever the water theme was] Located 3/2020
  7. Find the missing Cathedral Windows rag quilt Located! currently working on finishing, 7/2020
  8. Find the missing Asian bunny squares  - these have been located! 2/8/2020 (Confession, I started buying fabric to complete this project, after researching what I wanted to do with it)
  9. Fix my mouse nibbled hat [this may involve buying fabric!] -  This has ALSO been finished, thanks to a sewing weekend get away with friends! Now it needs to be trimmed, to cover the mouse eaten bits
This ought to keep me plenty busy for the new year.

This post originally published on 12/26/2019, updated 7/28/2020, 10/30/2020

Saturday, May 18, 2019

Wool grab bag

Okay, so this is not an affiliate links post, I'm getting absolutely no credit from Jimmy Beans for posting this. This was the first time I've ever ordered a mystery grab bag of any kind [and I've had zero luck with mystery projects...] so I thought I'd post my thing. It's sort of like opening Christmas. I ordered the grab bag because A. it was on sale [41% off!] and B. I was ordering some wool sample balls for another project. So, why not. 
If you live on the west coast, Jimmy Bean's is in Nevada, so it would probably come faster than three days - AND I'M NOT COMPLAINING ABOUT TURN AROUND. They offer free shipping on orders $75 or more every day, so when I order, I try to order $75 of yarn, but this time I had a free shipping coupon code. Yay coupons. 

Also, they have great customer service. Which I feel is important for e-commerce. 

The mystery bag promised
 400g of yarn, a couple notions, a project bag, and a pattern. 


400g of yarn, some notions, and a project bag delivered.
Obviously, not pictured is the pattern. 
Honestly, I probably never would have ever bought cable needles or a wool soak. And I usually make my own project bags, but it's a nice little project bag, and I'll keep it because it's making a direct knitting reference. I'm glad they were upfront about the fiber content - the website says primary fiber is wool, and then where it says specific fiber: varies [this isn't just for the mystery color bag, it's for all of them]. I was a little dubious, fearing that I would get a bag of exclusively wool+acrylic blends, but as soon as I saw the Madelinetosh I knew it wasn't so. I'm a self-proclaimed fiber snob and I was kind of hoping I'd have a bag of exclusively 100% wool to work on this other project I've got, but no matter. The wool blends will be used for charity projects, probably cowls. 


Mitered square blanket


Original publish date, May 18, 2019
This project has outgrown the Basket-of-Currently-Working-On, and lives in one of those folding knitting baskets of yesteryear... and I mean yesteryear, it's turned wood dowels and in all honesty, is at least on its third fabric basket incarnation  - the one I removed because it was literally disintegrating looked to be circa 1970s.  

Back to the knitting project. 
[If you're on Ravelry, here's a link to my project page for this blanket]

Yes, there's a story behind why I started this, but I don't remember what it was. Probably something to do with having leftover bits of worsted wool from projects and not wanting to make a scrap hat/scarf/whatever. A friend cleaning out her stash gave me the natural colored wool, two skeins of Lion Brand's Natural Fisherman's Wool in Oatmeal. She had already used some of it to make wool dryer balls, but I wasn't in the mood to nit-pick over free wool... She had also tried dying said wool a vibrant amethyst purple, which had a negative impact on the wool fibers [you can see an exemplar of that wool sample in the middle row, third square down from the top]. Every few inches the yarn either grew thin or one of the plys had disappeared altogether, needing to be cut and rejoined.  

I started out not actually knitting mitered squares but trying to knit squares as samples of stitches. Which didn't last long, they weren't uniform in size and there were issues with the gauge I was too lazy to work out. 

The squares themselves are fast and easy to knit up. 
Some things that were not easy - 
Remembering that I was using size 6 US needles. [Update, 2/8/2020 - I'm glad I made note of this, it seems I've been condo knitting this project with anything between a 6 and a 9! >_<]
Remembering exactly how many stitches were in each square - 25, if you're curious. 
Remembering which side to begin the cast on so that the little miter ridges aligned - yes, it matters, and I had no idea for the first 4 rows or so what I was doing. 

The squares don't take a lot of yarn, at least knitting up a 3" square with size 6 needles and 25 stitches. I believe my initial thought was to use scraps of wool up but to be honest, I don't have that much wool laying around, and the thought of having this thing laying about unfinished for potentially years was an unpleasant thought. I started looking for scrap ends of wool yarn. 

any idea how hard it is to find scrap ends of yarn? pretty darn. 

Enter [shameless plug] Jimmy Bean's Wool and their 15-yard samples of Malabrigo worsted - and 15 yards is still more than enough for one of these little squares. I've purchased 29 different samples, and I think I'm finally close to maxing out this source of scrap [what am I doing with the leftover leftovers? Turning it into a giant yarn ball...].

Here are some picture updates! Okay. One picture update, one that's really of my cat, but you can sort of see the texture and the colors. I will have to take some close up pictures of some of the squares.  


Monday, May 13, 2019

Marmalade

I have no idea what possessed me to make marmalade. But I did. And, like most things homemade, it tastes amazing.
Pictured (from L - R) are the star ingredients - a tangerine of forgotten origins, a Cara Cara orange, a blood orange, and the inside bits of a second Cara Cara. Plus the saved, julienned rind of another orange (Cara Cara? Navel? IDK) 
A quick Pinterest search pulled up a daunting list of recipes. Without wanting to bore you, dear reader, with stories of my youth connected to orange marmalade, or where I first had it, here is the recipe. Important notes will follow. 

Ingredients:

4 oranges (I used three different kinds to impact the flavor profile)
The julienned rind of four oranges
Juice of half a lemon, plus julienned rind if you feel like it. 
2 cups of white sugar
2 cups (16 oz) of water
1 tbsp vanilla

Materials

Large spoon
Microplane or v. sharp paring knife 
Medium saucepan
V. Sharp paring knife
An immersion blender (optional)
Bowl for peel, fruit pieces 
Citrus mauler or juicer
Candy or another food thermometer (optional)
Timer or favorite time keeping device- I’m a huge fan of Hulu or Netflix (one 45 minute episode is about how much time it will take for the jelly to cook)
Clean Glass jar/jars to store product!

Any necessary canning equipment, such as water bath, canning funnel, et cetera, if you plan to preserve some of this goodness for later. If so, wash jars and bands/ glass lids in hot soapy water, and sterilize. I wash, then throw everything into the canning pot, and let it come to and boil as I prep and cook the ingredients. Bringing the water bath to boil and boiling for 15 minutes usually takes the same amount of time it takes to prep and cook. Also, boiling jars more than 15 minutes never killed anyone. 
*this recipe makes exactly 7 (seven) of the tiny, 1/4 pint Ball jars (that’s like 4oz per jar?)*

Method

*if you are planning to preserve the fruit of your labor, set the water bath up now, with the jars and lids inside with enough water to cover them by two inches, and for heavens sakes, don’t forget to turn the burner on 😉)*

Wash citrus in warm water to help remove any wax (it’s food safe but still. Eww). With a paring knife or Microplane, remove as much of outer rind without white pith as you can. The pith will make your marmalade bitter, so adjust to your own taste. Chop rinds into small segments if you have ribbons, about 1-2 inches long. 
Peel citrus, removing as much of the white pith as you can. Break apart the fruit into its individual petals. Chop fruit into smaller pieces, about 1 inch. Citrus does not need to be separated from the membrane, just remove white pith and seeds. Cut the lemon in half, zest outer rind and add to the orange rind, juice lemon, removing seeds.

Put fruit and water into a saucepan on medium heat. Incorporate sugar one cup at a time, stirring until dissolved. (Or throw it in all at once, but make sure you stir!); add vanilla.
***

At this time, it is important to remember that basically what you are making is a jelly. This takes more time than you might think if you haven’t done it before.

This is where setting a timer or Netflix comes in handy. Set a 45-minute timer or put on a 45-minute episode of something you wouldn't mind watching again and are fairly familiar with already. For me, this could be an episode of Star Trek, Firefly, the early seasons of NCIS or the BBC's Father Brown or Death in Paradise [crime drama much?]. The length of the show [45 minutes] is about how long it's going to take for the sugars and fruit to gel, maybe a little longer, and if you're anything like me, standing and stirring molten sugar water for 45 minutes gets boring. The thermometer is also handy, as jelly happens at 220* F. The jelly needs to be stirred or it will scorch, hence the familiar story.
Once the marmalade has reached 220*, it's ready! If not canning, funnel into a quart-size glass jar and cap. Let cool before refrigerating. [why glass? it doesn't leech chemicals when exposed to heat, unlike plastic]

If canning, ladle into glass jars one at a time; wipe rim, place lid and secure ring, replacing in water bath. Process for 15 minutes. Remove jars and listen for that magical pop sound; check that lids have sealed by examining the lid's dimple. If it's down, you're good. Anything that did not seal will have to be reprocessed or put in the refrigerator.  I didn't have 7 containers, I planned for 6, so I hastily cleaned a small glass jar that had pesto in it, and funneled the last bits of the marmalade into it. Paddington Bear would be proud.

If you're still confused, check out Alton Brown's marmalade instructions - his recipe will make more than mine, but he actually teaches you to cook, and tells you what to look for.

Sunday, March 31, 2019

South Marysburgh Slippers

So... it looks like I have readership? Or maybe just trawling robots, who knows. I haven't figured out what's wrong with my comments section, and since no one really comments... I'ma go with trawling robots are reading my blog.

No matter.

Ravelry [which, if you haven't been or don't know about, you should go] isn't letting me update pictures to my project library. That said.

I made these slippers as an alternative to my shearling moccasins. I had just made slippers in a chunky weight yarn for Christmas, and was happy with the idea of the slippers, and the way the projects came out using the chunky weight yarn, but not happy with the particular pattern I used. I went back and searched Ravelry's free knitting patterns for slippers, and was attracted to this pattern.


What I didn't find attractive was knitting a heel flap in a worsted weight yarn. Frankly I don't like knitting heel flaps at all. With left over chunky weight yarn, I decided to do some tinkering, and I came up with a thicker version of the original worsted weight that more or less fit my feet.
For the stitch counters out there, the orange band around the top is a 1xKP rib over about 42 stitches, and it was a whopping three rounds before a stretchy bind off. 
I now have three other pairs in wool blend chunky weight yarn because they are so comfortable, and they wash easily. They look nice with two contrasting solid colors, or done with a variegated and a complimentary solid.

In case you are not on Ravelry, here are my notes on making these slippers with a chunky weight:

*Please note, this is not my original pattern, but an adaptation of a free, original pattern to suit an alternative yarn weight.*

Materials:

two skeins of chunky [6] weight yarn, or amounts to total 12 grams/ 240 yards
Set of US 7 DPNs 
stitch marker of preference; it's there to mark where the row begins. 
Tapestry needle or crochet hook to weave in ends.

Suitable yarns:
Easy care:
Buttercream Luxe Craft Alpaca [Joann's - 20% alpaca, 80% acrylic]
Wool Ease Thick and Quick [Lion Brand - 20% wool, 80% acrylic]

Malabrigo Rasta [malabrigo, 100% superwash Peruvian merino wool] - this one retails for  ~$22 a skein, but it is cloud soft and comes in multitudinous color varieties.Did I mention it's soft? I mean AMAZING soft?

*A skein each of the main color and contrasting color are sufficient to make two pairs. 


Method:

*I need to knit another one of these to make sure that these instructions are correct. Proceed with caution*
  • C/O 9 sts using a long tail cast on.
    Slipping first stitch, knit 1x1 KP rib for eight rows.
  • begin turning heel using short rows.
  • Knit across 7sts, turn. 
  • Slip working stitch, Purl across 4 sts, turn
  • Slip working stitch, knit across 4 sts, K2Tog, turn
  • Slip working stitch, p across 5 sts, turn
  • Slip working st, k across 6 sts, K2tog, turn

Continue in this manner until all stitches have been worked and there is a tiny cup for the heel; end on a k/p side, it doesn't matter. You will have to pick up stitches along the side of the heel flap either way. Ending on a  K side is generally preferred.
  • Pick up 8 sts along the side of the heel flap Knit wise
  • Turn and, if sts picked up on purl side, knit down side of flap and across heel. 
  • Pick up 8 sts on opposite side of heel flap. Turn.
  • Work in garter stitch for 8-10 rows, depending on how deep you want the opening for your foot, ending on a K side.  
  • C/O 10 sts at the end of the row to bridge the gap of the foot and create the top of the slipper. When joining to opposite side, slip first stitch of work and PSSO the 10th cast on stitch [this will help secure the join]. Place marker. 
  • Continue knitting until slipper comes to the base of the intended wearer's big toe
    [mine go 14 rounds]
  • BEGIN DECREASE 
    • if you haven't already divided your stitches evenly between two dpns, now is the time to do it. Make certain that the slipper is oriented on the needles to that as the toe is decreased, it's decreasing in the right direction for a toe [Don't ask me how I know this...] You should have 28 stitches, so 14 on each needle
    • Beginning at the start of a row, K1, K2Tog, K across to last 3 sts, SSK, K last stitch. 
    • Repeat on opposite side. You now have 12 sts on each needle. 
    • Continue decreasing in this manner until there are 4 total sts, 2 on each needle.
    • Cut working yarn so that there is a 3 inch tail. Pull tail through last 4 sts to bind off. Flip slipper inside out and weave in ends
Huzzah! you now have ONE finished slipper! Do it all again to make a second!


For contrasting band

With contrasting color, pick up 42-44 sts around opening of the foot. If your opening is bigger, you will need to account for this, but make sure there are an even number of stitches. Once all sts have been picked up, place marker. Work in 1x1 rib for 3 rounds. Bind off with a stretchy cast off of choosing; I chose to knit the knit stitches and purl the purl stitches as I was PSSOing. There's a name for this cast off, and I don't remember what it is. 
It should go with out saying, but do this for both slippers. 
If you want a taller cuff, continue working the 1x1 rib until it reaches desired length; still use a stretchy c/o. 

Additional Notes:

This whole project [a finished pair of slippers with the tails woven in] knit up in the time it took to watch three Die Hard movies 1, 4, 2

Here was an additional note from my Ravelry project page regarding the toe decrease:

02-02-2019

So, no joke, I love these so much that I’ve made four pairs now. If I purchase two different colors, it’s usually enough for a pair of slippers in each color, plus a little bit left over from each to create the cuff for the opposite pair; I am a US size 8 1/2 wide.
I tend to forget that when knitting the body of the foot that I don’t need to decrease until the body of the foot comes to the base of my big toe, and even then as I haven’t used an all wool bulky yarn for this project yet, that I could probably go another round or two before the decrease, which I do every row, starting with the stitches split equally on two DPN’s, usually looking at the top of the foot, and begin a K2 decrease after knitting the first stitch, K across to last three sts, then SSK, K last stitch. Flip to bottom, repeat. The decrease goes fast.

Sunday, January 13, 2019

Make Mead and Be Merry

My first foray into mead making was almost two years ago. I have no idea why I threw it together, but I did after reading the forum about Joe’s Ancient Mead over at homebrewtalk.com, having discovered I had all the ingredients on hand.

It turned out amazing. After aging for over a year.

Needing to wait a year was not my intention- I imagined brewing something up in December, then carting along a finished product to share with friends at a Reenactment about six months later.

My family was inspired by my efforts... after tasting the aged product. So for Christmas this year, I got several pounds of honey, and a wink wink nudge nudge.
To that end, there is a second batch of Ancient mead now aging in a hermetically sealed pickle jar in the basement, and an apricot vanilla mead just getting started on the counter.