I have nothing against patchwork. But now, I'm in the school of a row of sameness creates visual calm on a shelf. And I'm in the mood to create some visual camouflage. I'm also in the mood to not cut out a bunch of squares and sew them together (have we heard of strip quilting and stack-and-whack? no? poor, poor soul.)
Okay, in the spirit of brutal honesty, I'm in the mood for someone else to do 90% of the work around here. But this is simple. And pretty put together. Out of stash materials. Fat quarters. Ideally, I'd have 3 fabrics, and I'd make a whole matching set of them to corral miscellaneous but related items in my spotless living room, giving the illusion that I am organized ... let's just start with making the buckety baskety bags, shall we?
 How you decorate the outside is up to you. Penguins like patchwork. I'm shooting for using up my stash. Also, less cutting is awesome. Requires way less thought. I picked out 4 matching fat quarters for the interior lining. That said: Utilize Fat Quarters. Use two, one for the lining and the other for exterior, or make like I did and piece an exterior out of longish scraps.
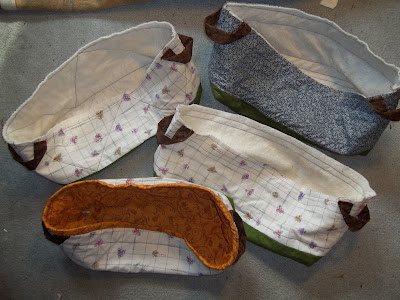
 I had some extra batting, so I decided to make one more, with a blue exterior. The interiors are all the same gold viney material.


Once the exteriors are pieced together, it's time to attach the batting to the exterior. Penguins recommend quilting, with which I concur. Not having and itches to stitch in [referencing quilting done in seam lines] I opted for quilting simple rectangles.Except on this little one on the right, which I tried quilting triangles. It did not work out quite so well.
 Time to attach the buckety baskety handles! Again, in an attempt at sameness, I opted to use the same type of fabric. Conveniently, I had four ~9" squares pre-cut out of a textured brown cotton, which I cut in half down the middle as shown. Those are a pair of Gingher 8" dressmaker shears, more or less for scale purposes. The rough, long edges of the rectangles are folded in towards each other so that they are more or less equally spaced on either side, long sides meeting in the middle. With the long, rough sides remaining in the middle, the new rectangles are folded in half again, and stitched closed along the edge where the two folds meet. Neat, clean, easy. We like easy.
Rummaging around in the stash suitcase (you know, for quick getaways), I pulled out some random pieces that I knew I wouldn't find chaotic on a shelf. Blue is the odd man out since there's not enough of the cream floral check to go around a 4th buckety-basket. And then I hauled out this piece of left over green to unify the bottom pieces. Easy-peasy so far. Unifying color on the bottom = good. I trimmed the scrap materials to 22" long to match the bucket lining. I cut the cream fabrics in half longways, measured the two of them, and figured out I'd need 8" of my selected bucket bottom - the loverly bottle green. Finished, the green will be 7 1/2", figuring in 1/4" seam allowances, making the cream strips a little under 6". The blue was a little less conveniently cut, so I waited until I had the cream figured out and used it as a pattern. To make it go a little faster, I chain stitched everything, that is to say, once I had the first one figured out, I constructed each part of the bucket at the same time; all the linings were sewn at the same time, all the handles, all the exteriors, et cetera. It's a little like an assembly line principle.
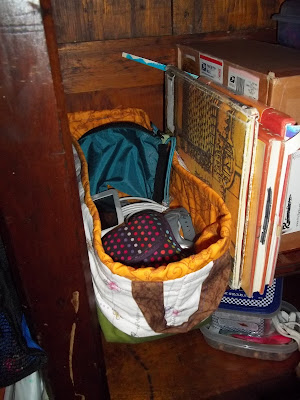
Once the lovely baskety-buckets are sewn together, they can be put to work, corralling all those little odds and ends... in this case, my frequently used electronic devices and accessories.
Over all, this wasn't a bad project. The depth of my shelves are conducive to using a fat-quarter length, and the finish width of this bucket is actually about the size of a CD case. Too bad I already have a CD storage system, because these are really cute.


No comments:
Post a Comment